DIY Faux Concrete Fireplace- How To
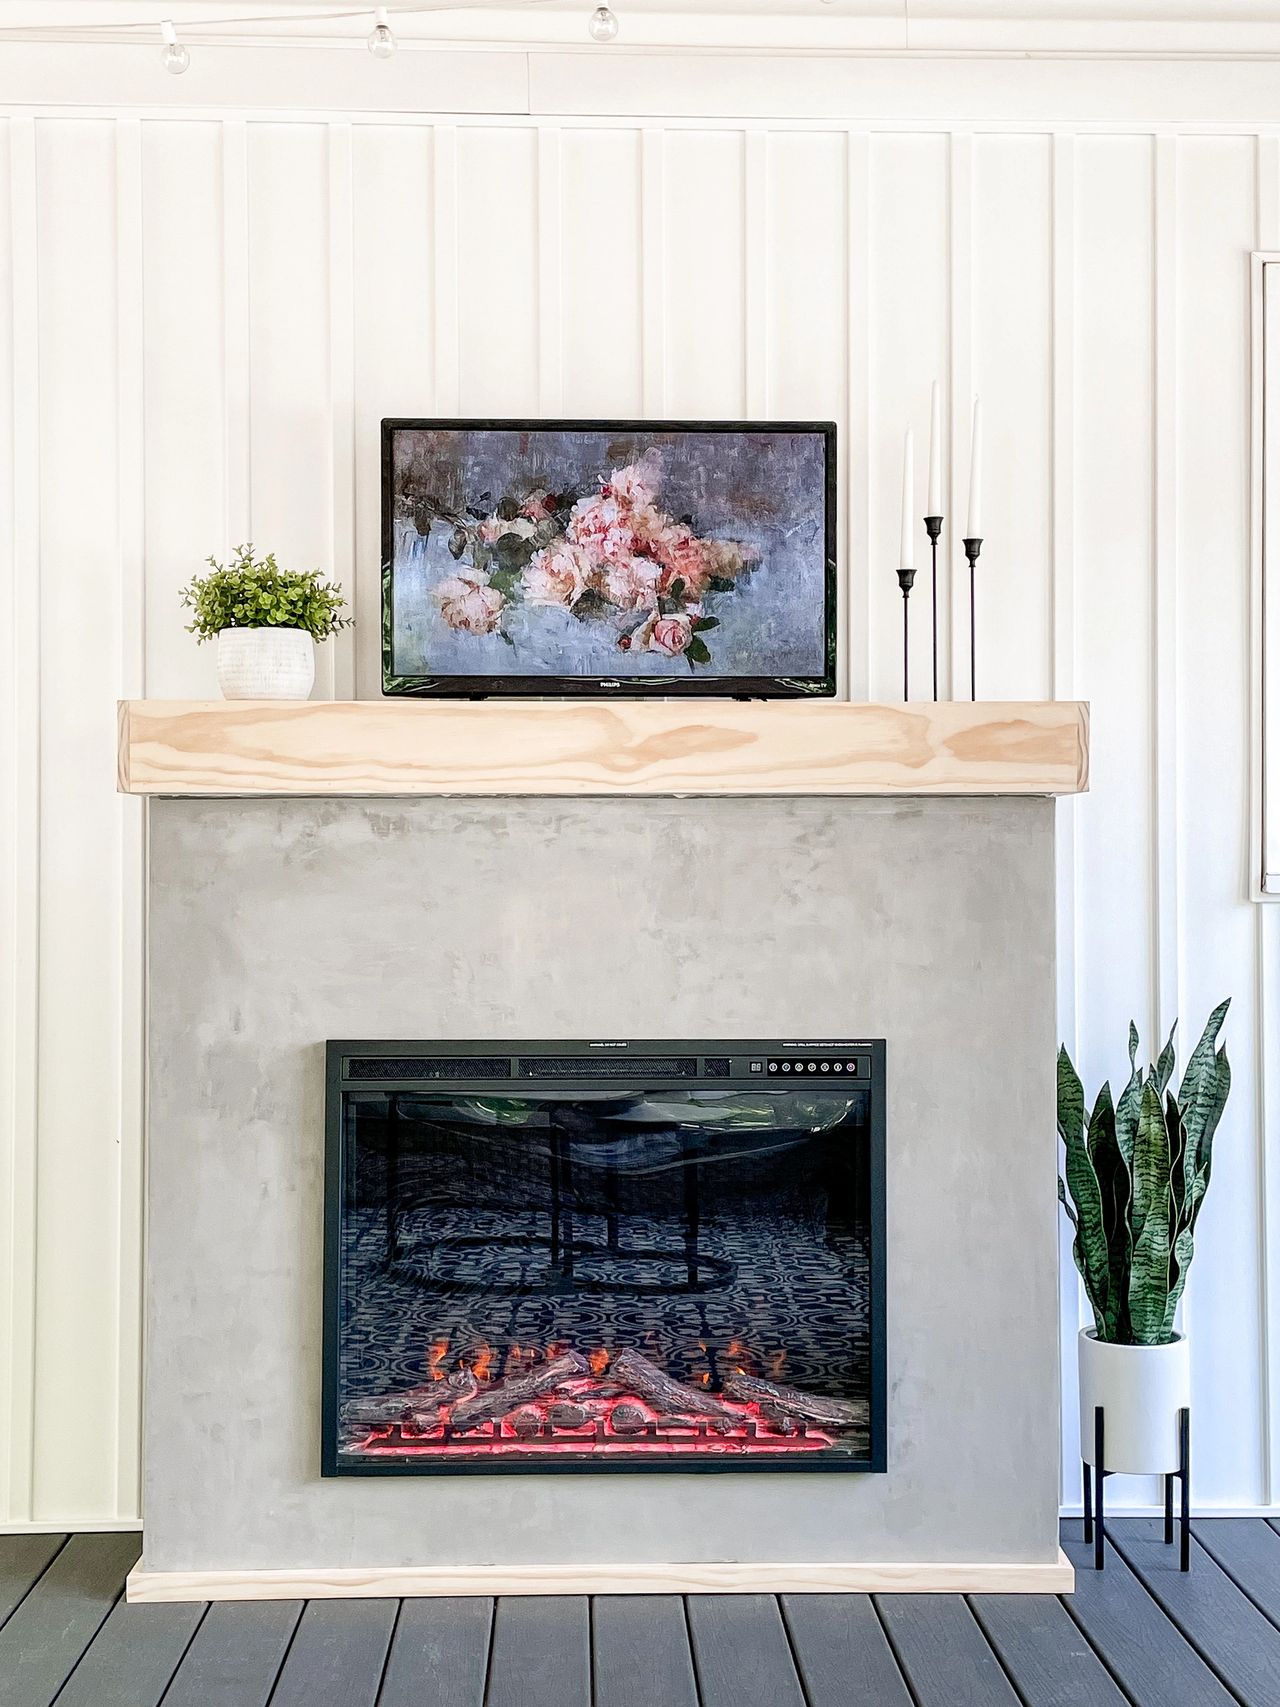
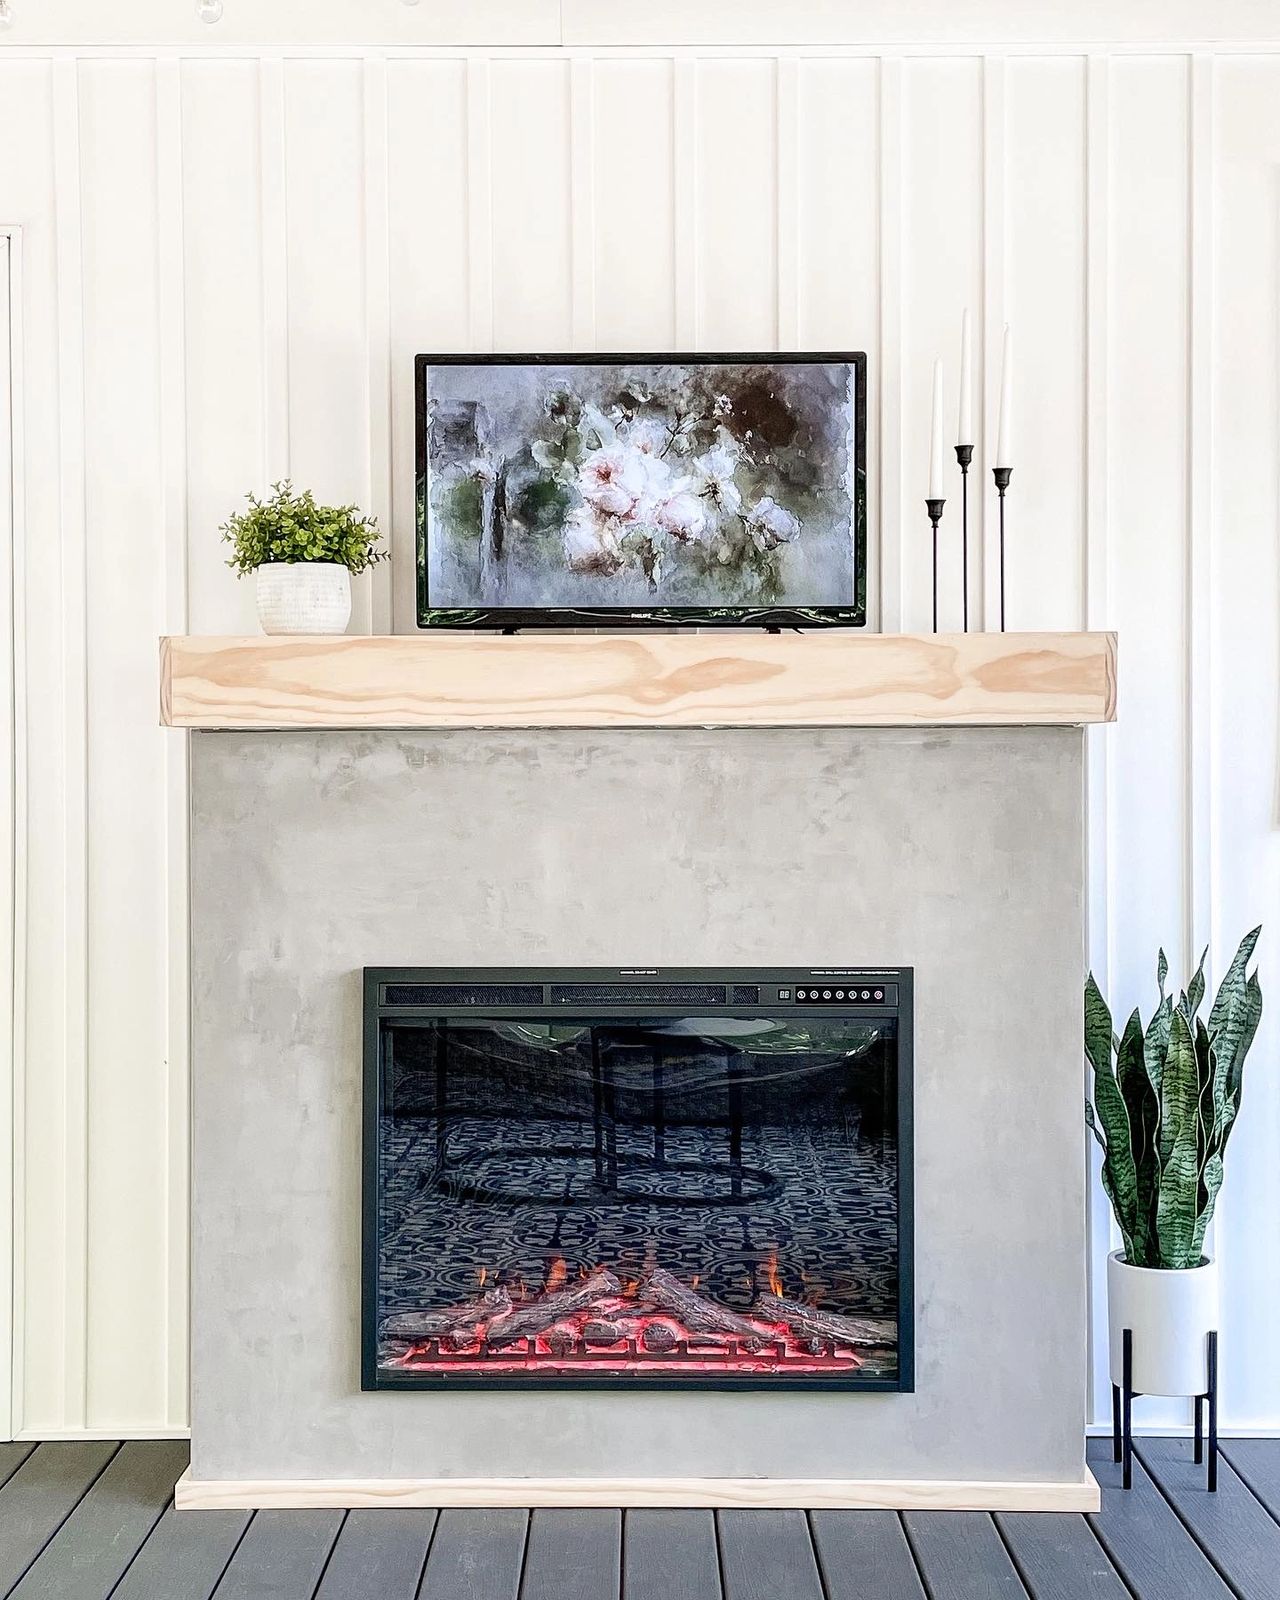
When we had our back screened porch built I knew a fireplace was something I wanted to add. It’s the perfect touch for ambiance and making this porch usable for all the seasons! This fireplace is perfect for inside or outside and will be such a great addition to any space!
Tools needed:
•Circular Saw/table saw/Miter Saw
Supplies:
•10 2×4
•2 1x12x8
•1 1x6x8
•Kreg Screws/Wood Screws
•Wood Glue
•Hardi-Backer Board
•Backer Screws
•Bucket
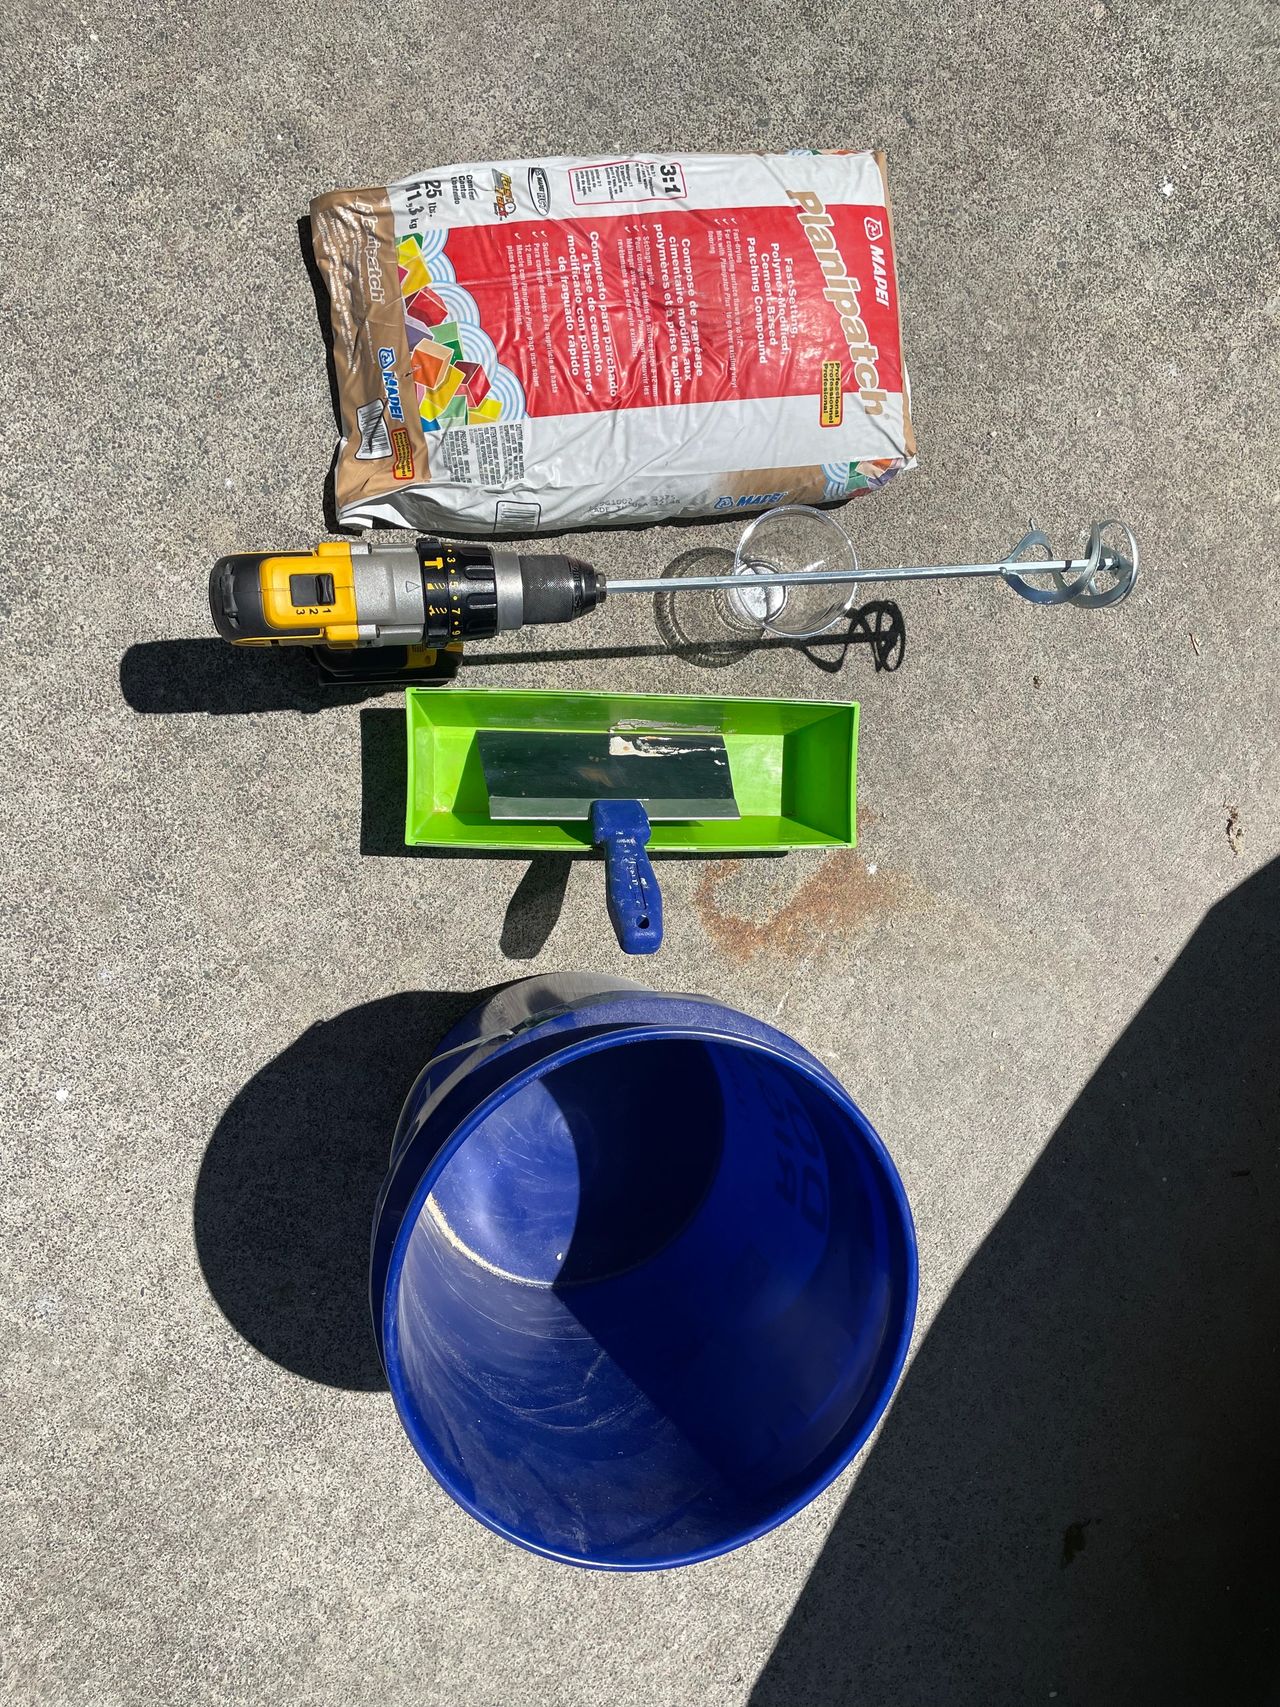
•Planipatch
•Fireplace insert use code LBB10
•Durarock/Joint compound
•Mold Resistant mesh tape
Getting Started
To start off this project you will need to determine the size of your fireplace in total. In addition you will need to have your fireplace insert to determine width of face frame. For this project I used 46 x 10 x 57 for the dimensions of my fireplace with a 32 Inch frame for inset.
Building the Frame
Once you have determined your dimensions you will begin to build the frame of your fireplace. To do so start by creating 2 boxes based on your dimensions (mine is 46X10x57).
With your boards cut to length you will need to create pocket holes which you will use to attach the frames together
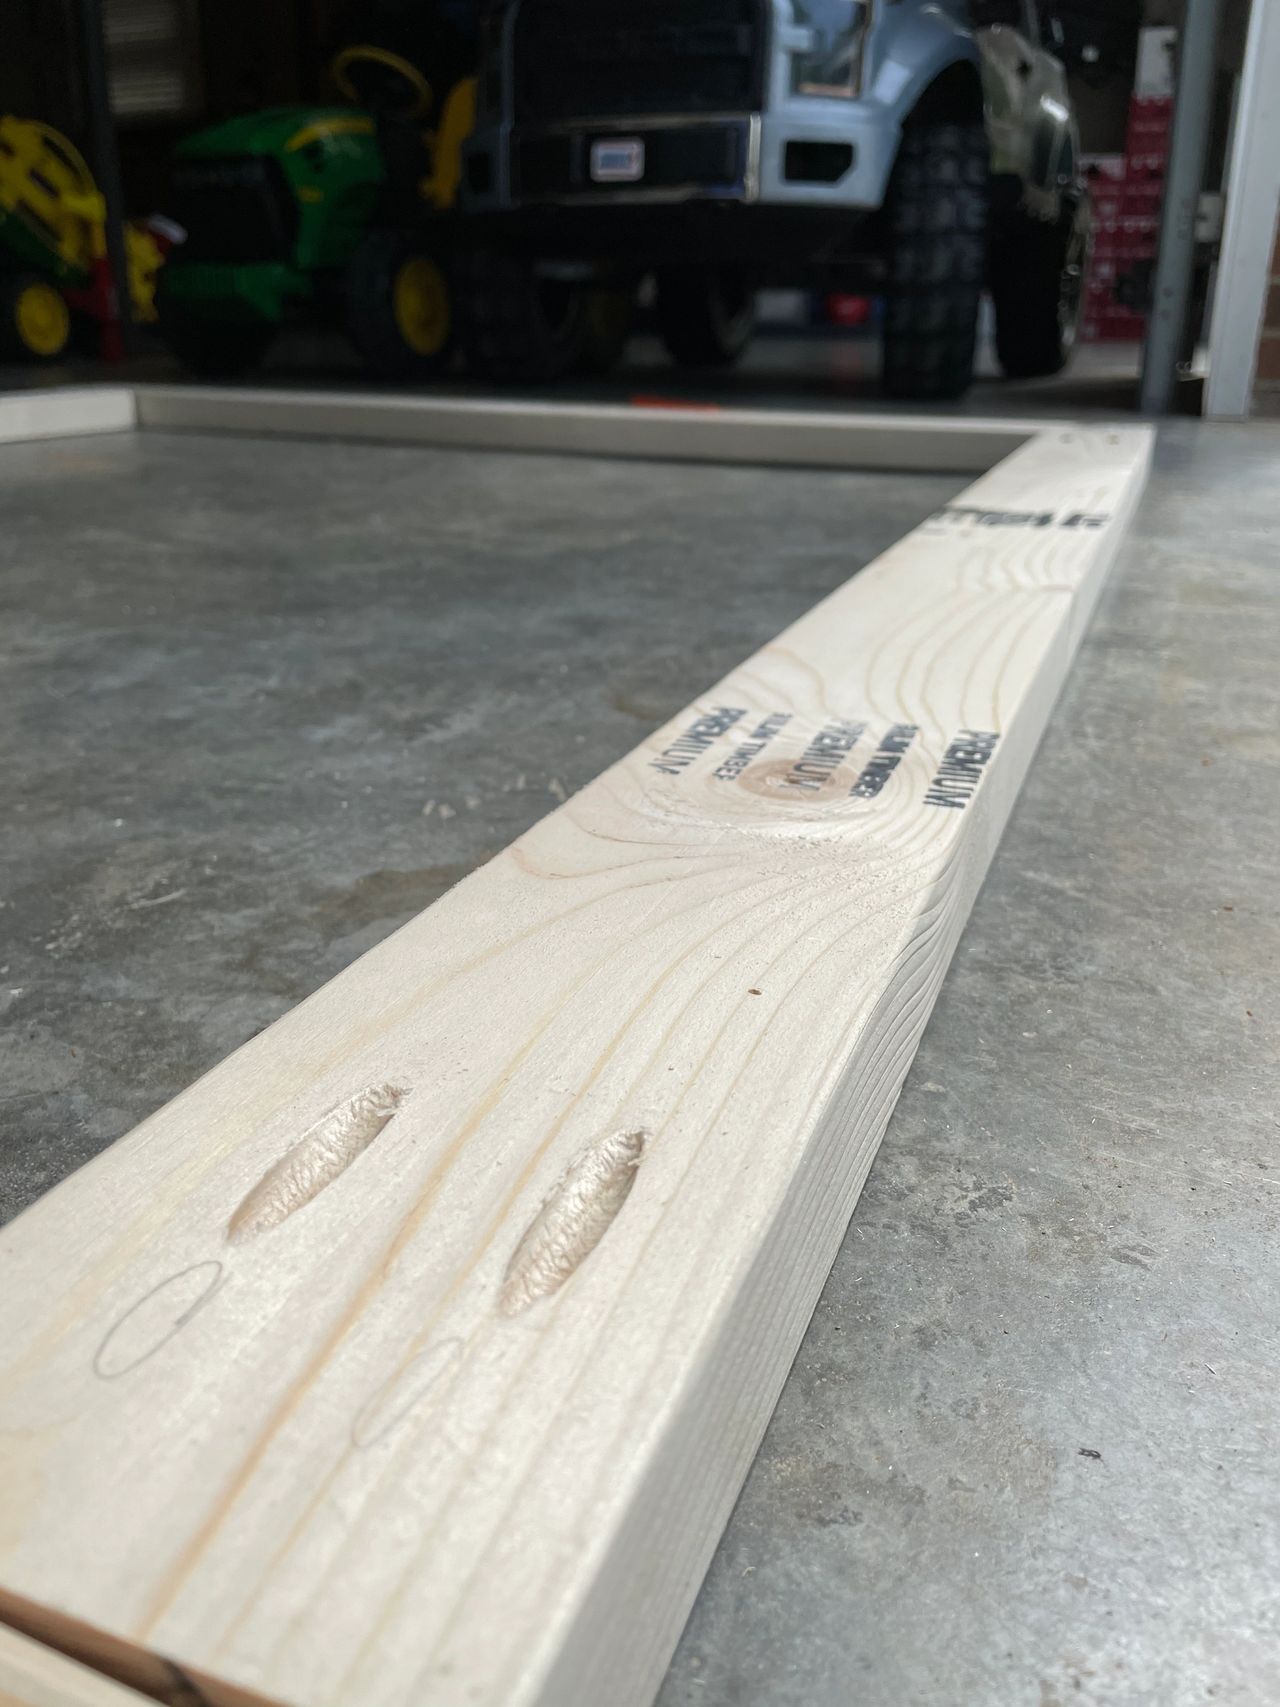
Once you have your pocket holes you are ready to attach! Using your speed square to ensure perfect corners, line up and apply wood glue then screen all your corner pieces together resulting in 2 identical box frames.
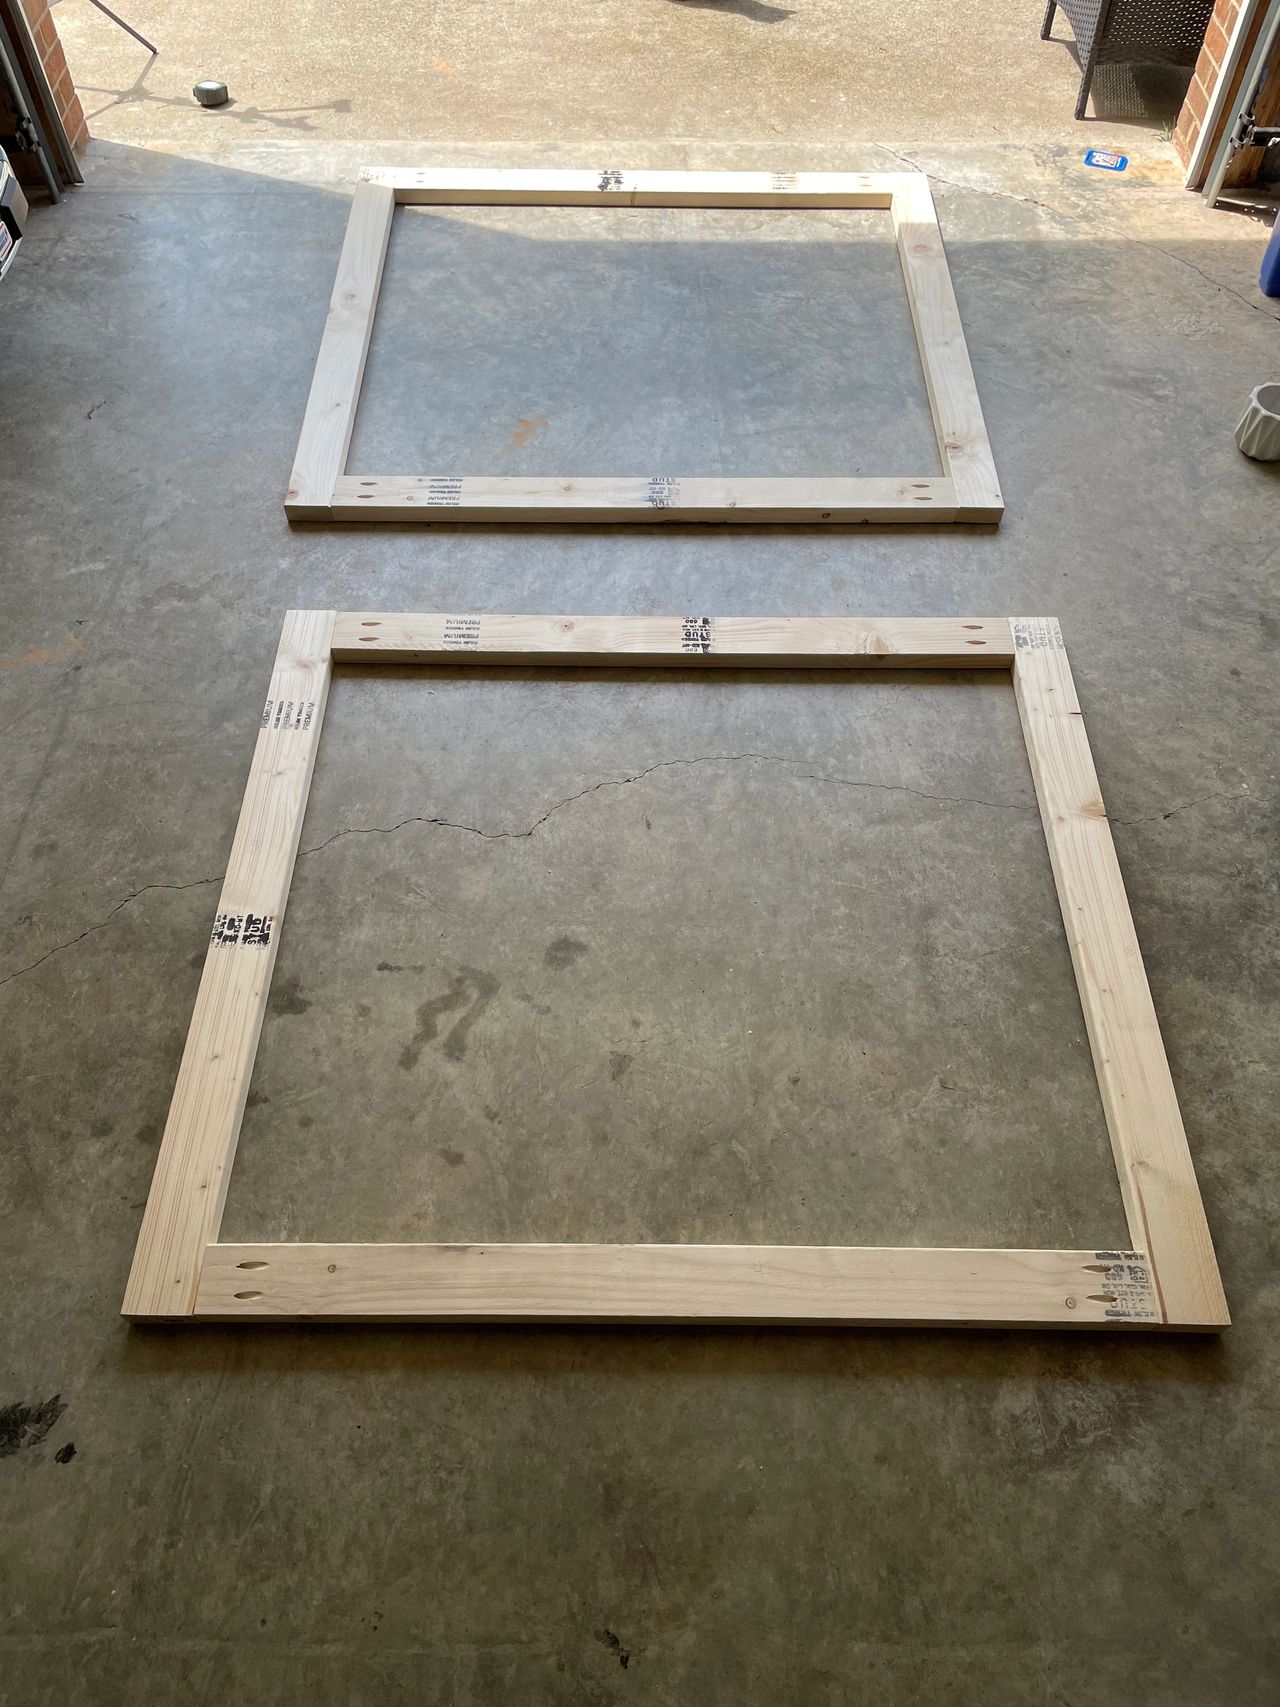
Now that you have the front and back frames made you will need to attach with the sides. Based on the total width of your fireplace you will then cut your 2×4 to length minus the front and back frame. I used a total of 10 inch width using 7 inch sides to attach to the frame to make a full box.
**note to attach the sides you can countersink the screws to attach or use pocket holes (make sure pocket holes face outwards otherwise you won’t be able to reach holes to drive screw)
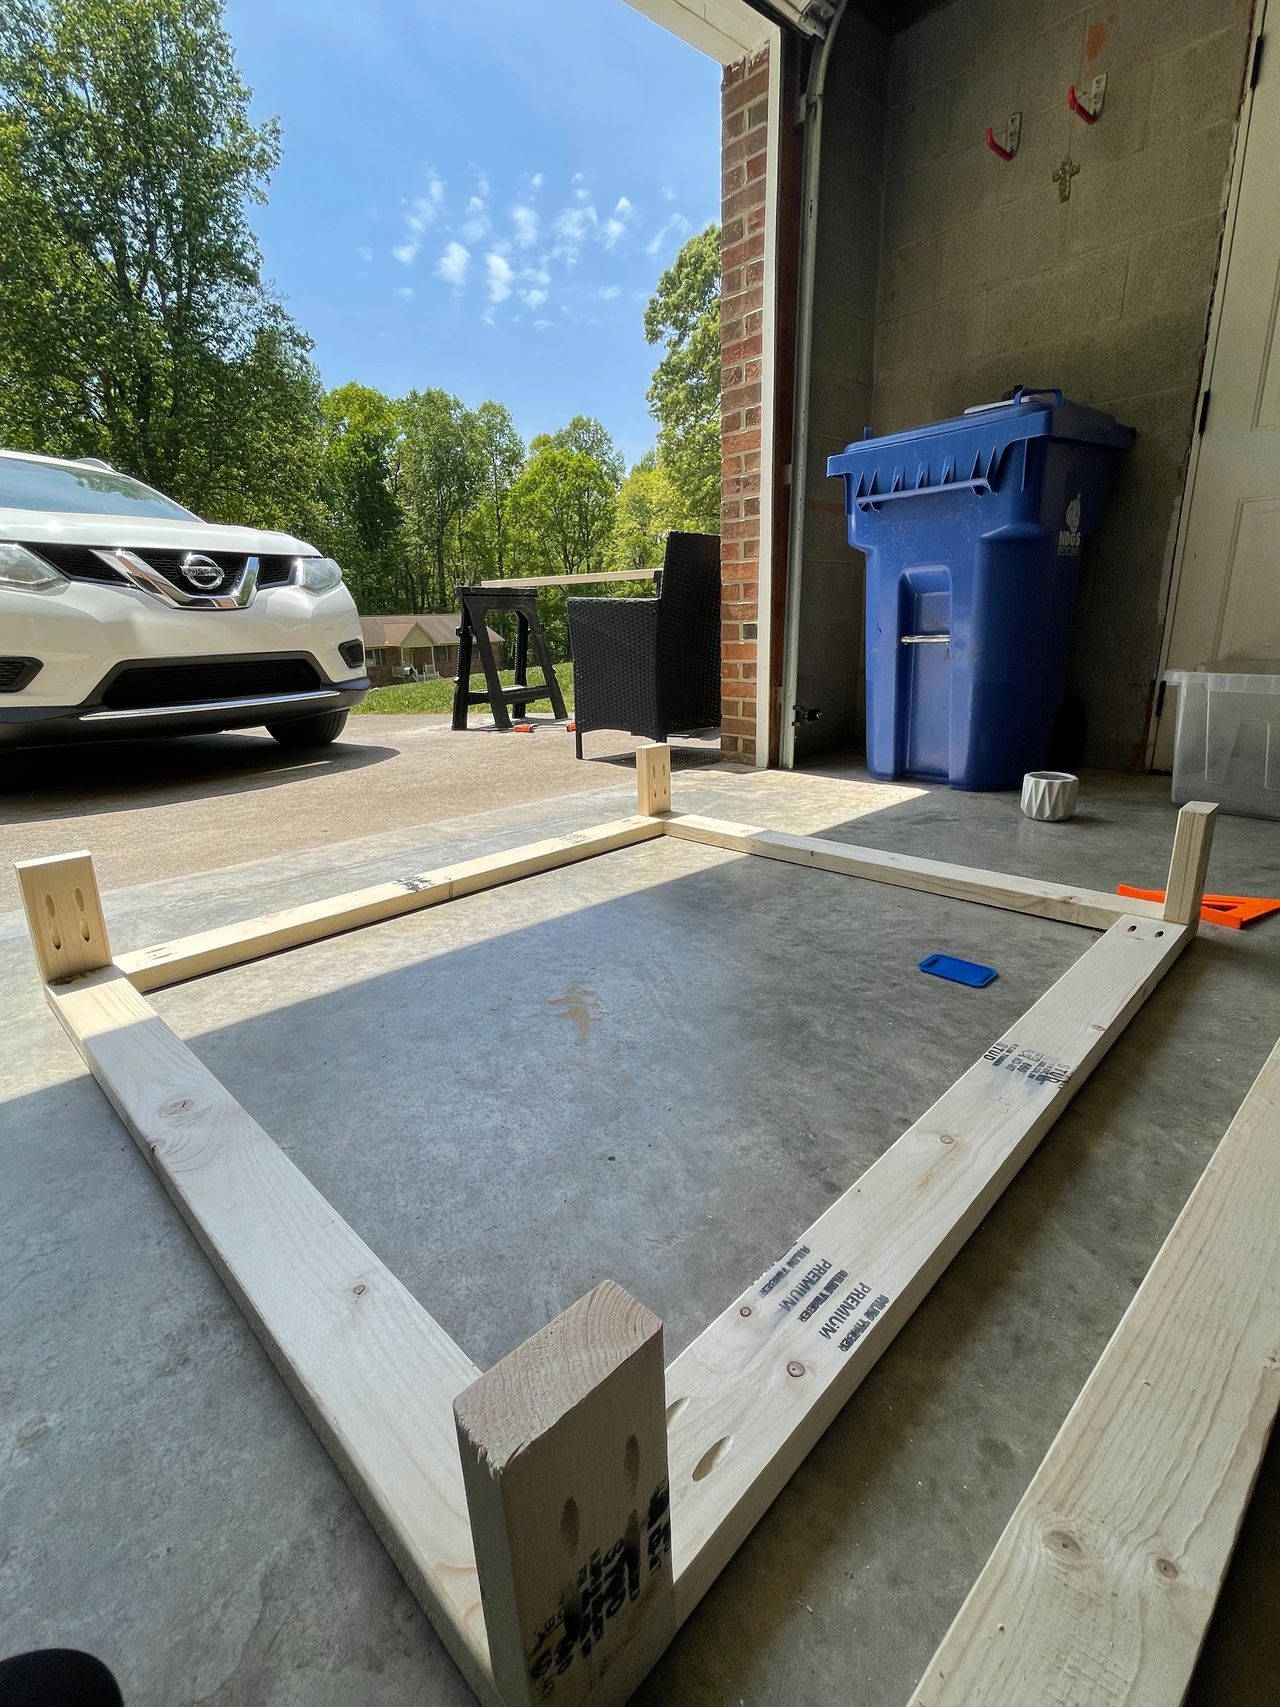
Once the side is attached you will then attach the other side of the frame.
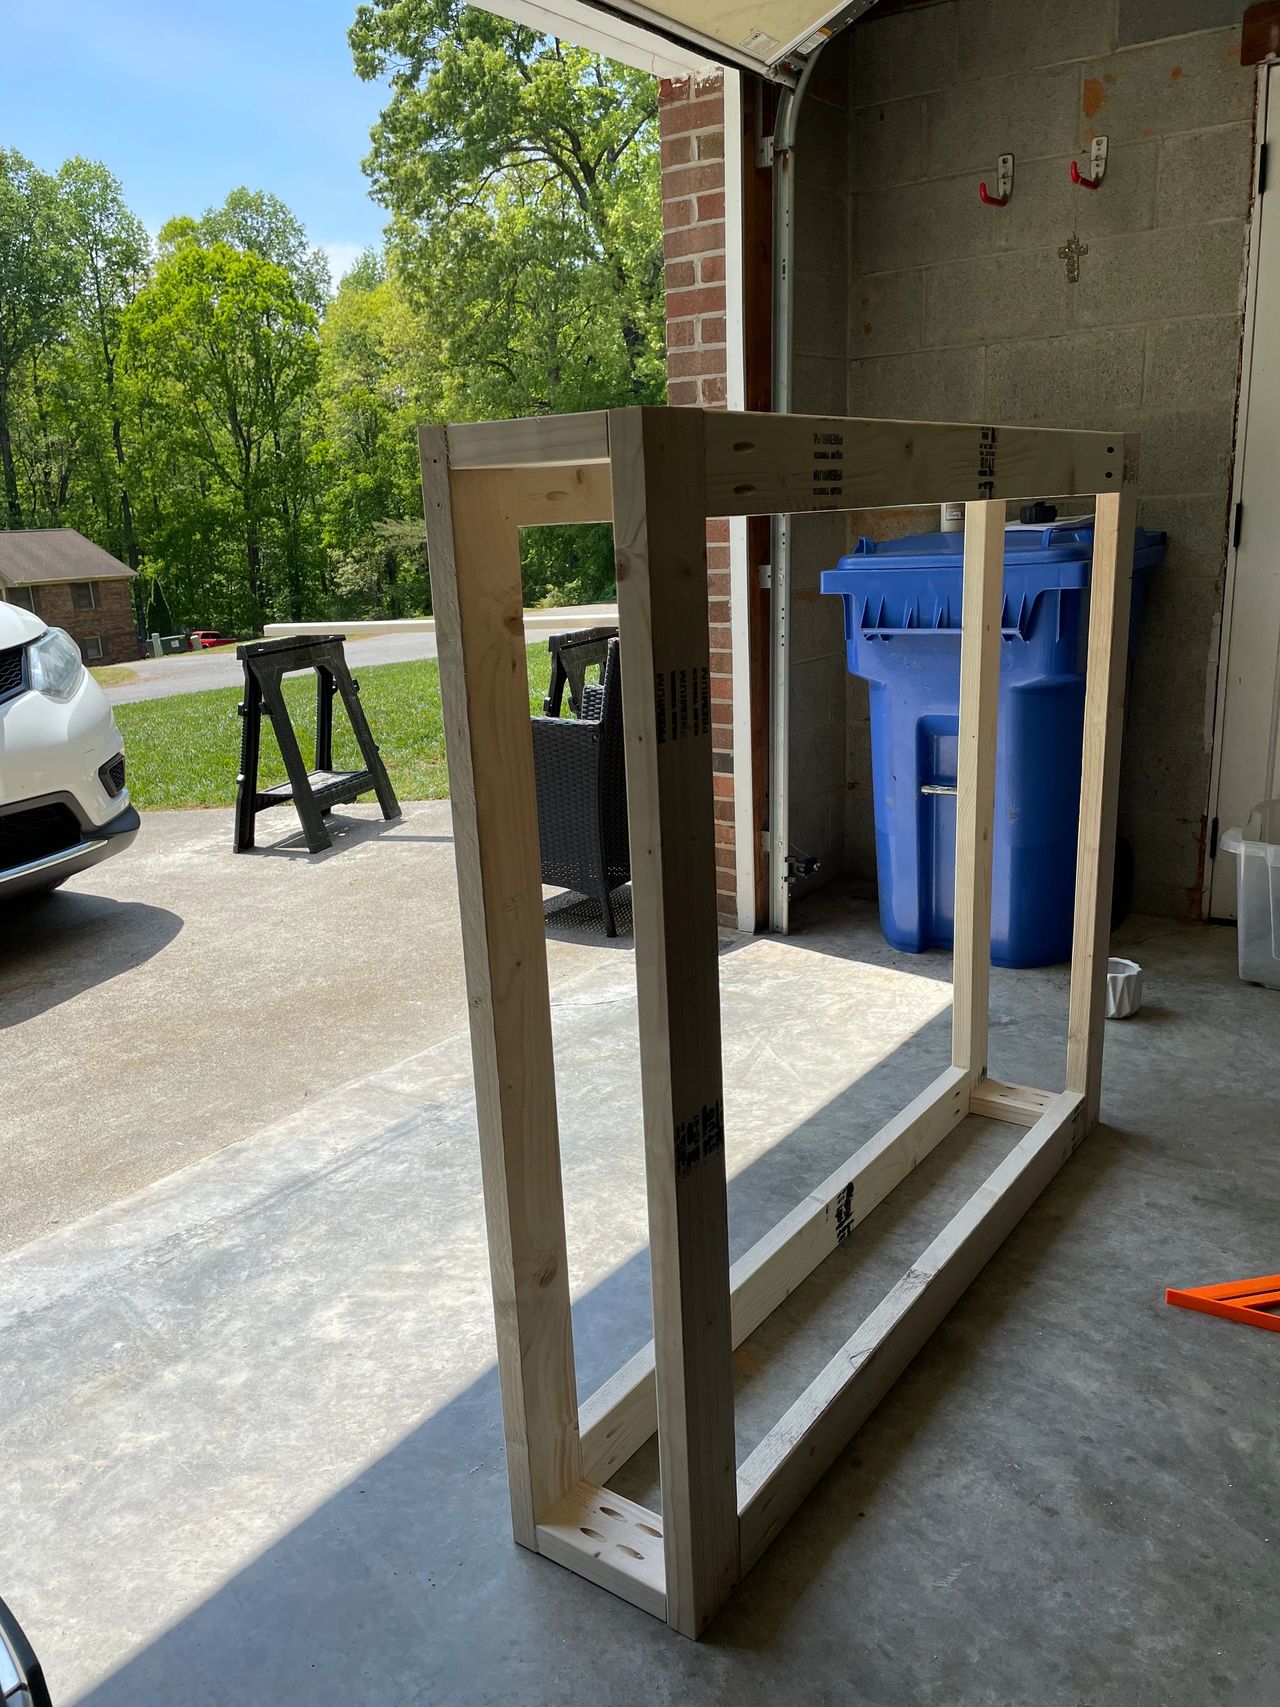
Now it is time to add supports. By cutting multiple 7 inch wide 2×4’s, I added in supports throughout all the sides and top of the fireplace (keep in mind you will mount the mantle to the top supports). I used countersink holes for this step instead of pocket holes. I also knew I wanted my fireplace to sit higher than the bottom 2×4 so I attached an additional board which the fireplace will rest on.
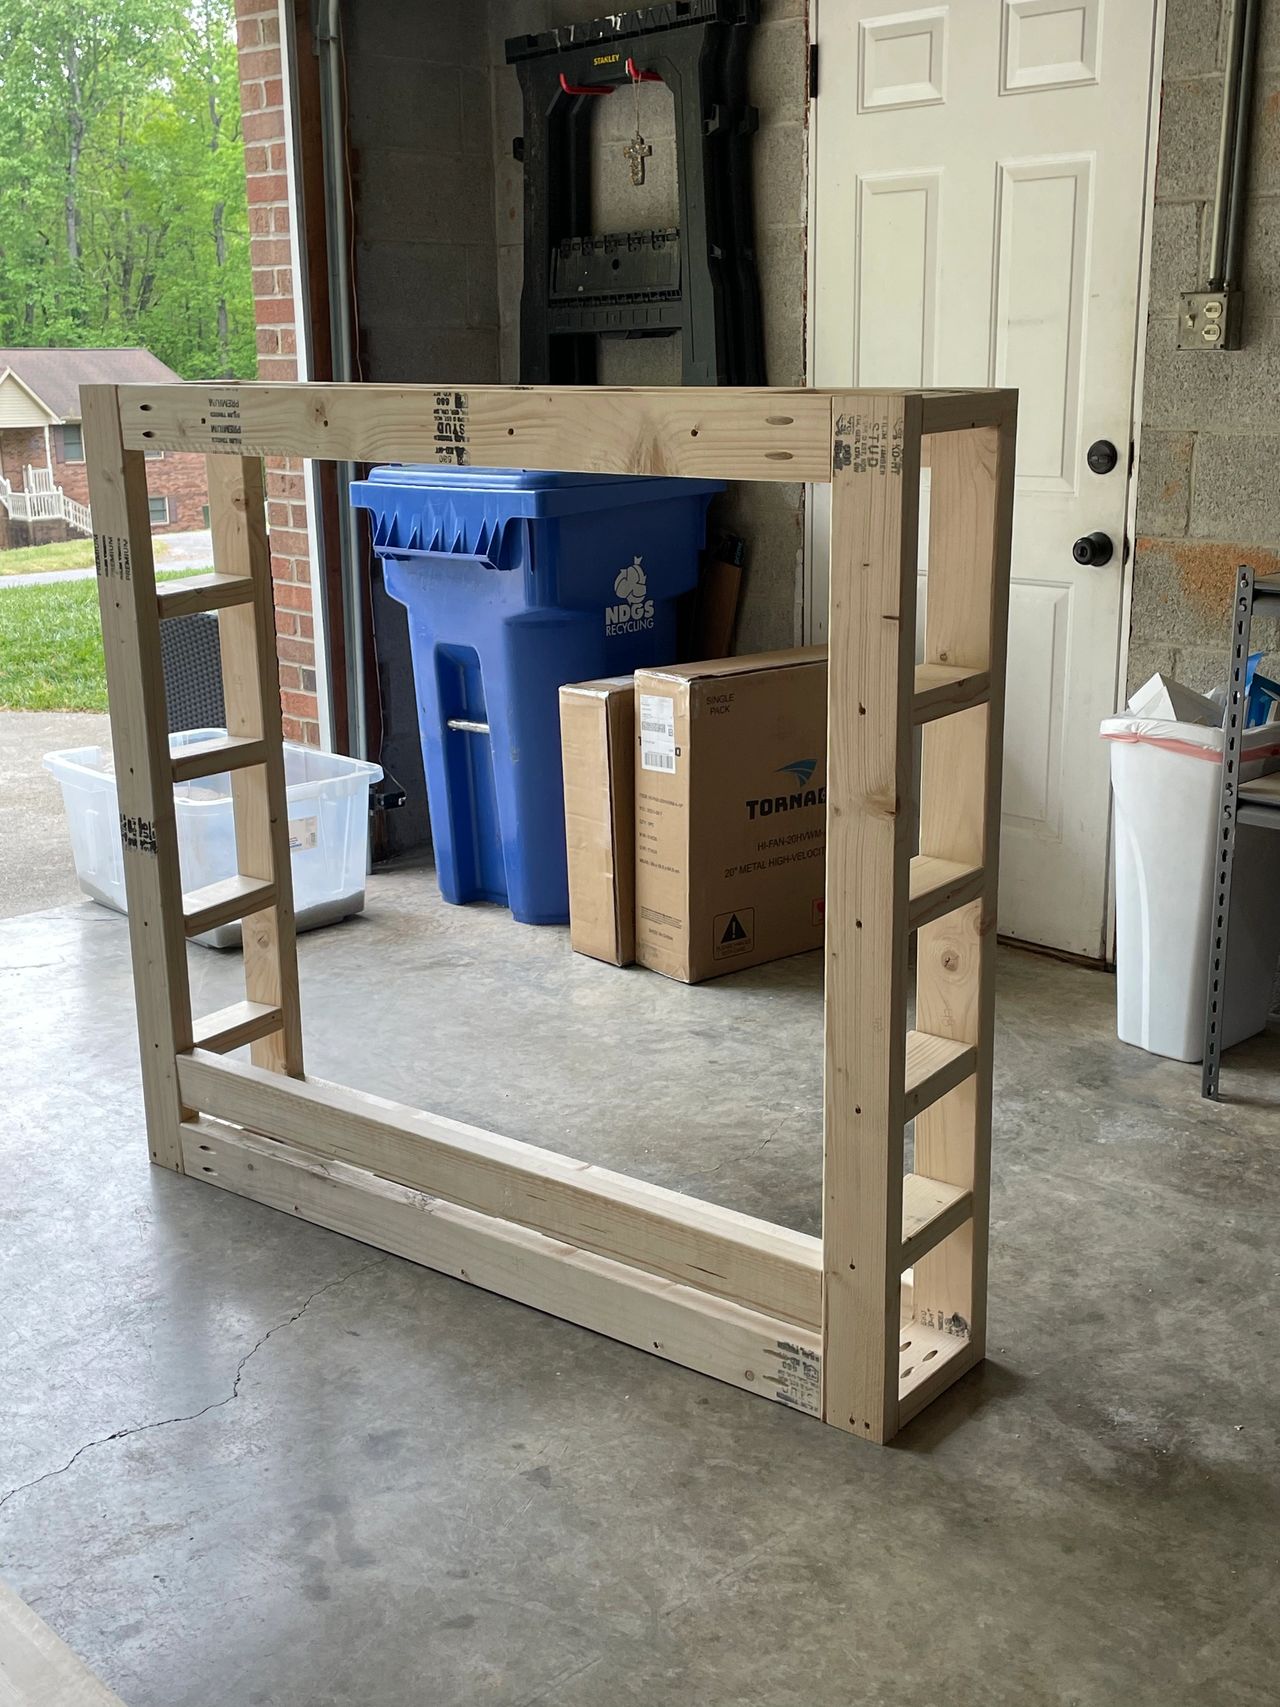
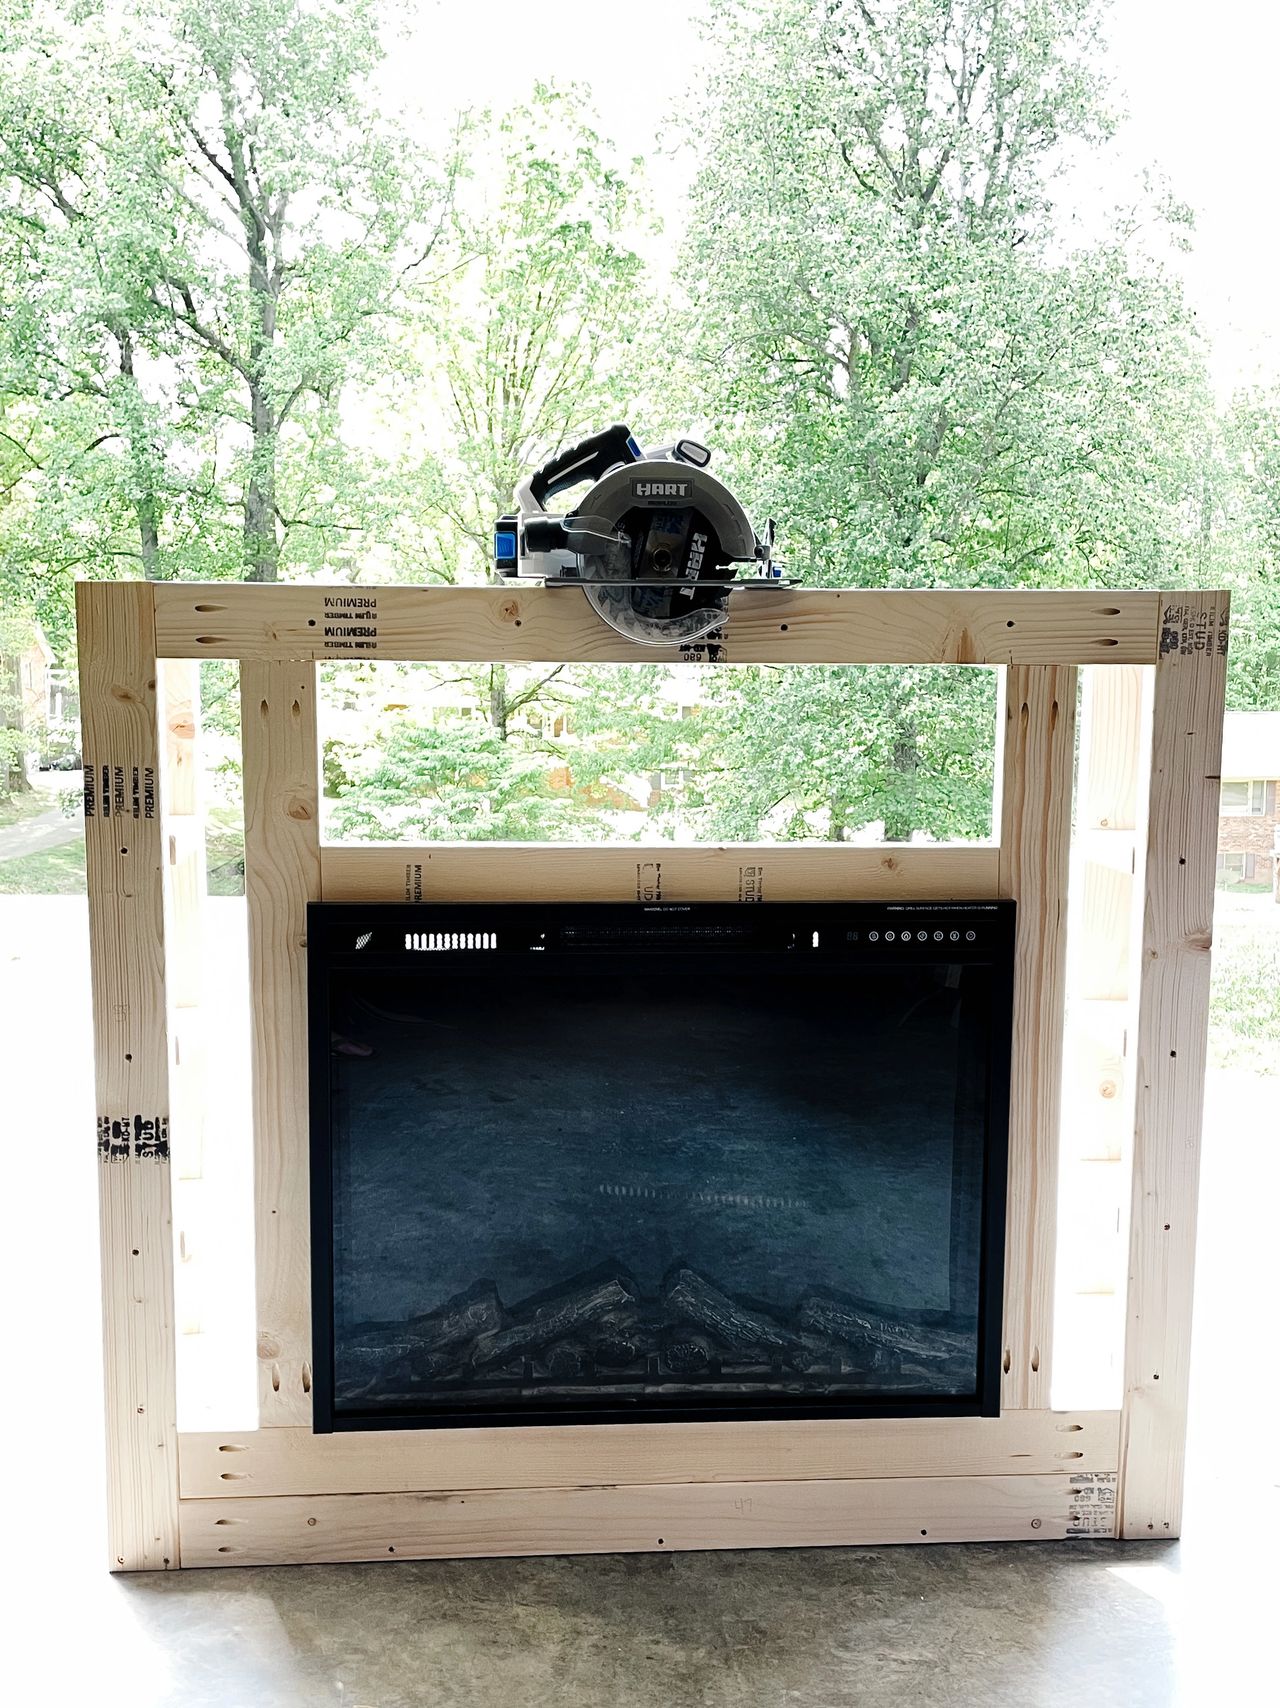
Last thing you will need to do is dry fit your fireplace insert to determine the frame in which it will attach. Based on my dimensions I added in side supports in the front frame which hold the insert in place.
Hart tools circular saw made this project a breeze!
Attaching Concrete Board
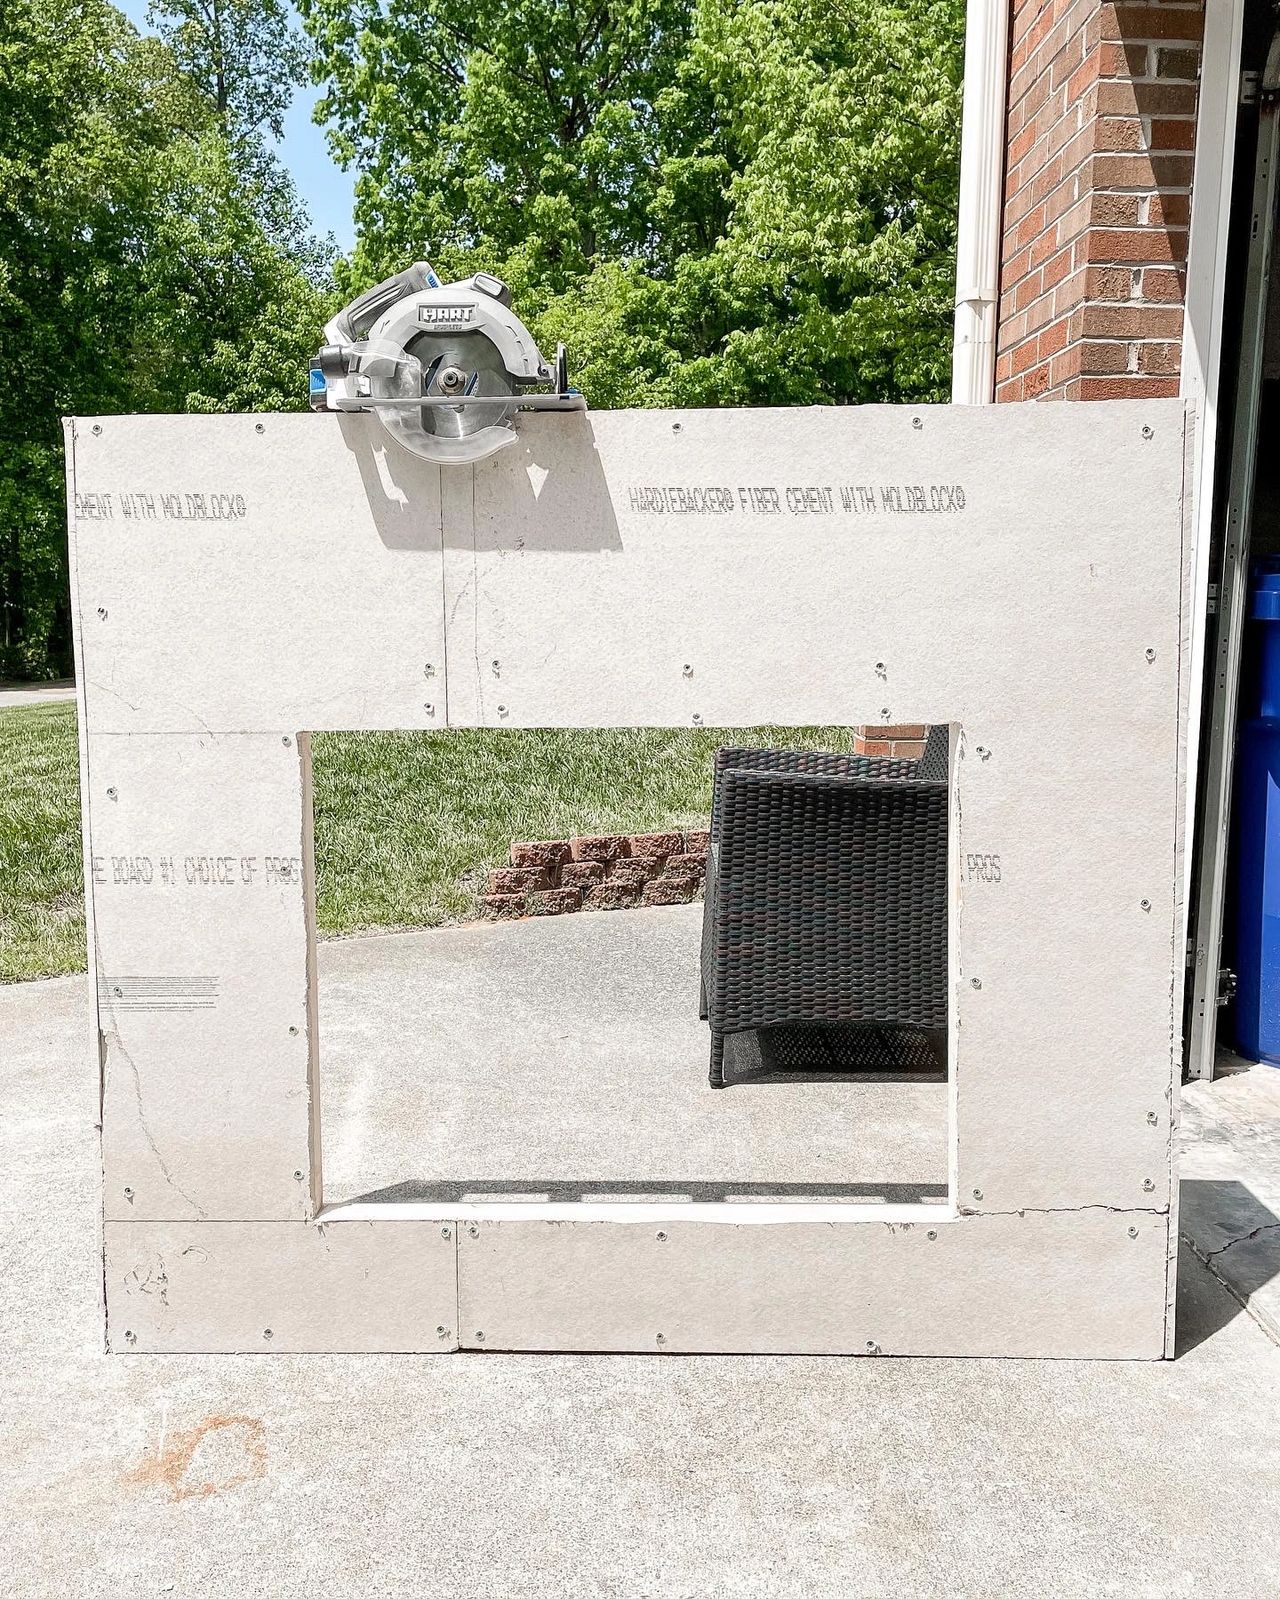
Using Hardi-backer cement board you will attach it to all the surfaces using backer screws (ensure that your screw is slightly below the board- do not screw too tight or you will break the concrete board)
To cut the backer board you can use a variety of things including a sharp knife but I found easiest (but messy) way to cut was my circular saw. Be sure to use the proper protection! Cover the front and sides of the fireplace.
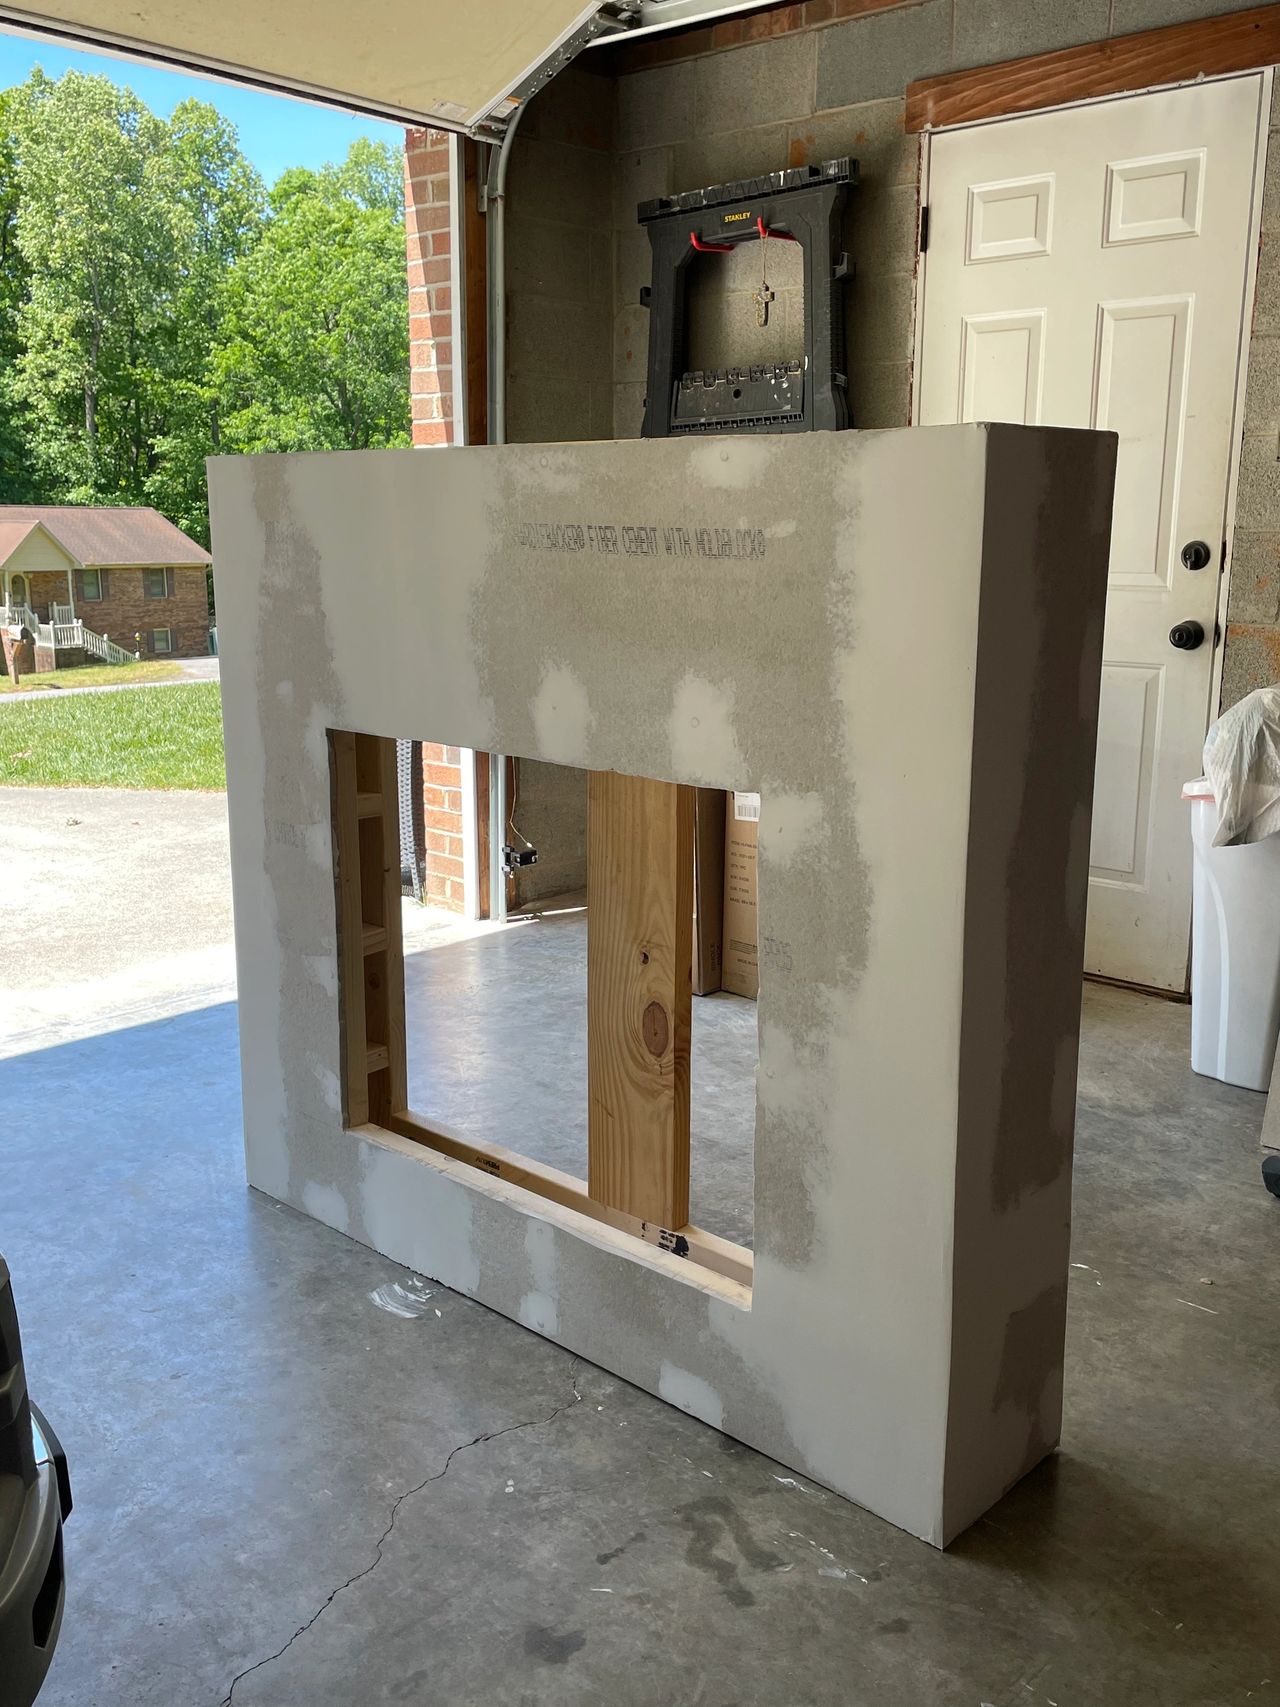
Once you have covered with the backer board it is now time to cover your joints and seams to create a flat finish. Using durarock (recommended) or joint compound with a mold resistant mesh tape and corner edges cover joints and seams then sand til all joints and seams are covered and smooth. **May require multiple coats
Faux Concrete Finish
Now that you have everything added, you are ready to add the faux concrete. After some research I found that planipatch was the best choice for me. Planipatch is a product used in flooring but makes a great faux concrete look. This product sets in 8-10 mins from the time you mix to when it starts to harden so your working time is very short.
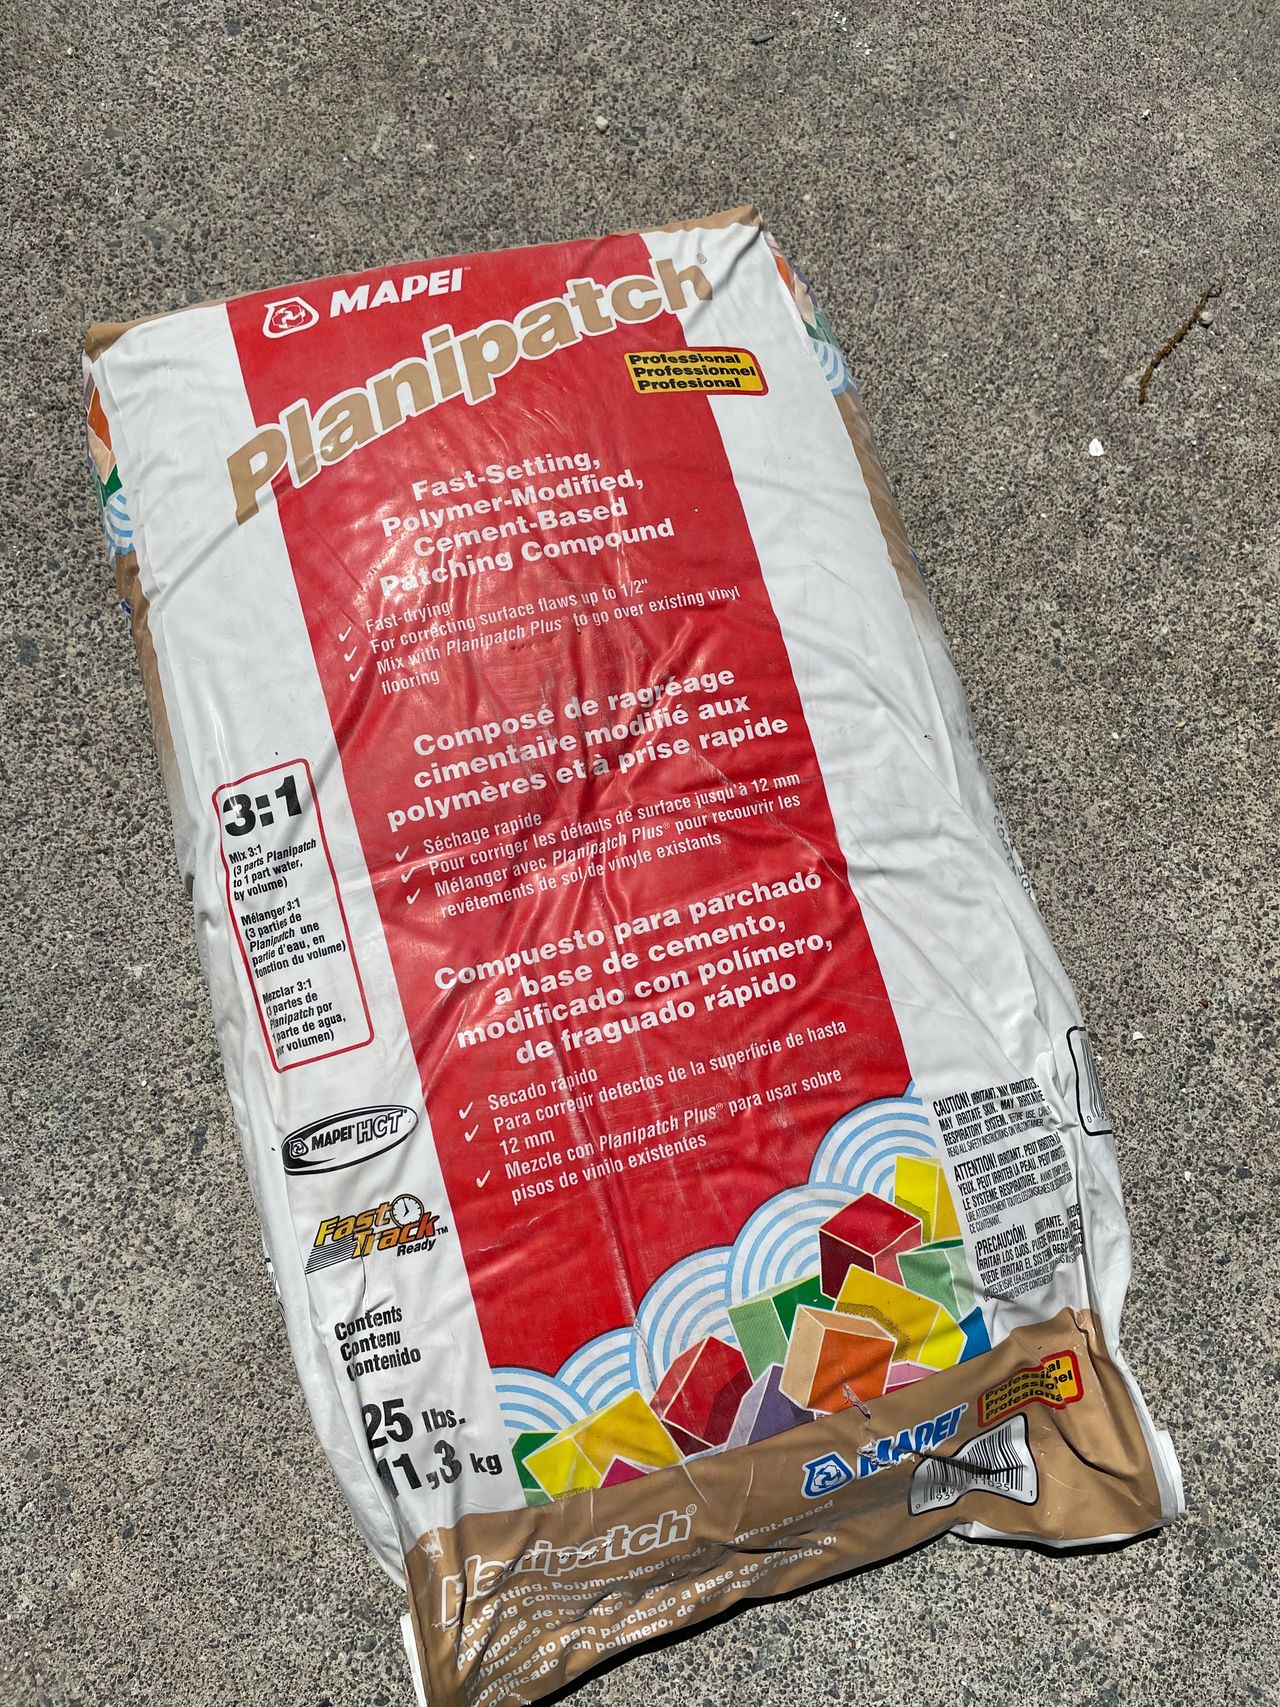
Planipatch recommendation: mix in a gallon bag so you can throw out after each setting. Use the mixer paddle and planipatch and water mixture to a consistency which you deem usable. I found that around 1 cup of planipatch and 1/2 cup water worked best for me! Be sure to wash off and change bags after each setting to avoid scratches and divots in your faux concrete.
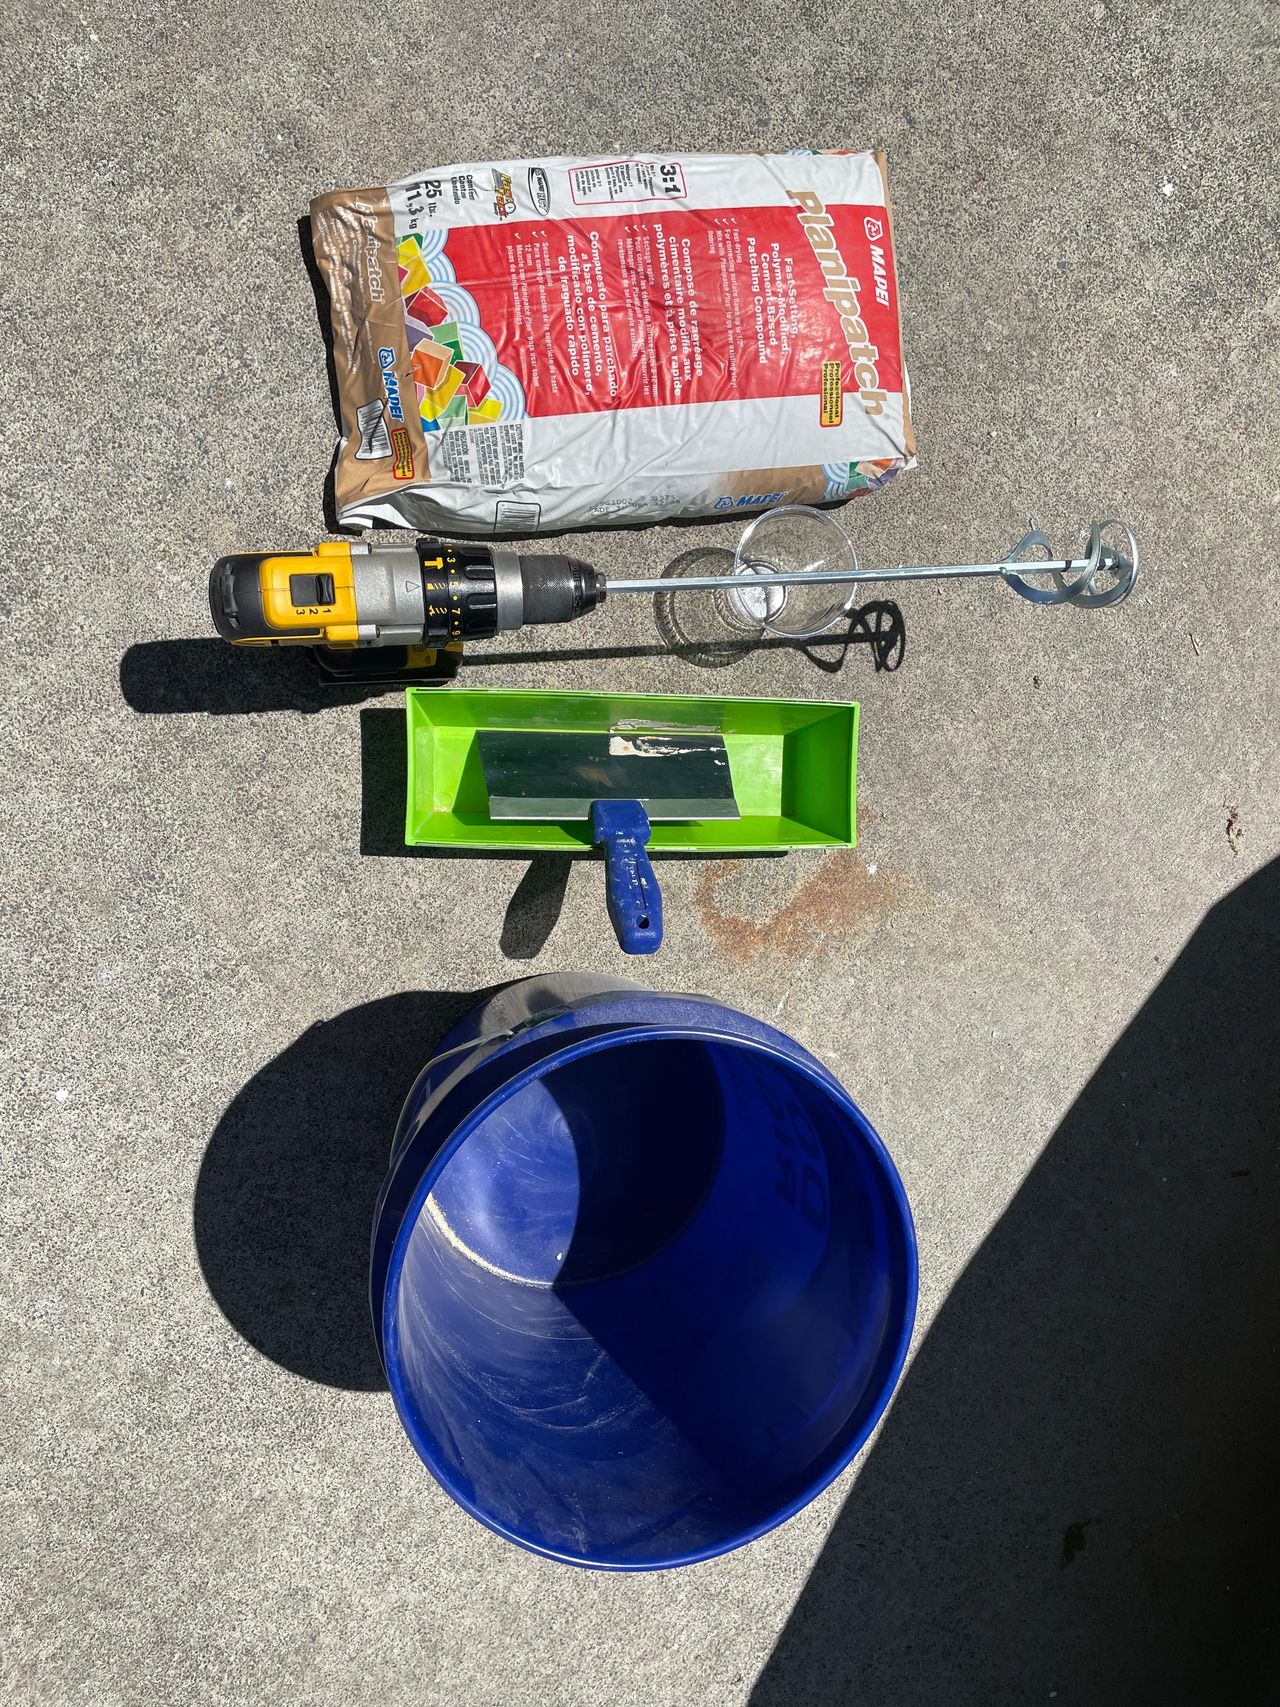
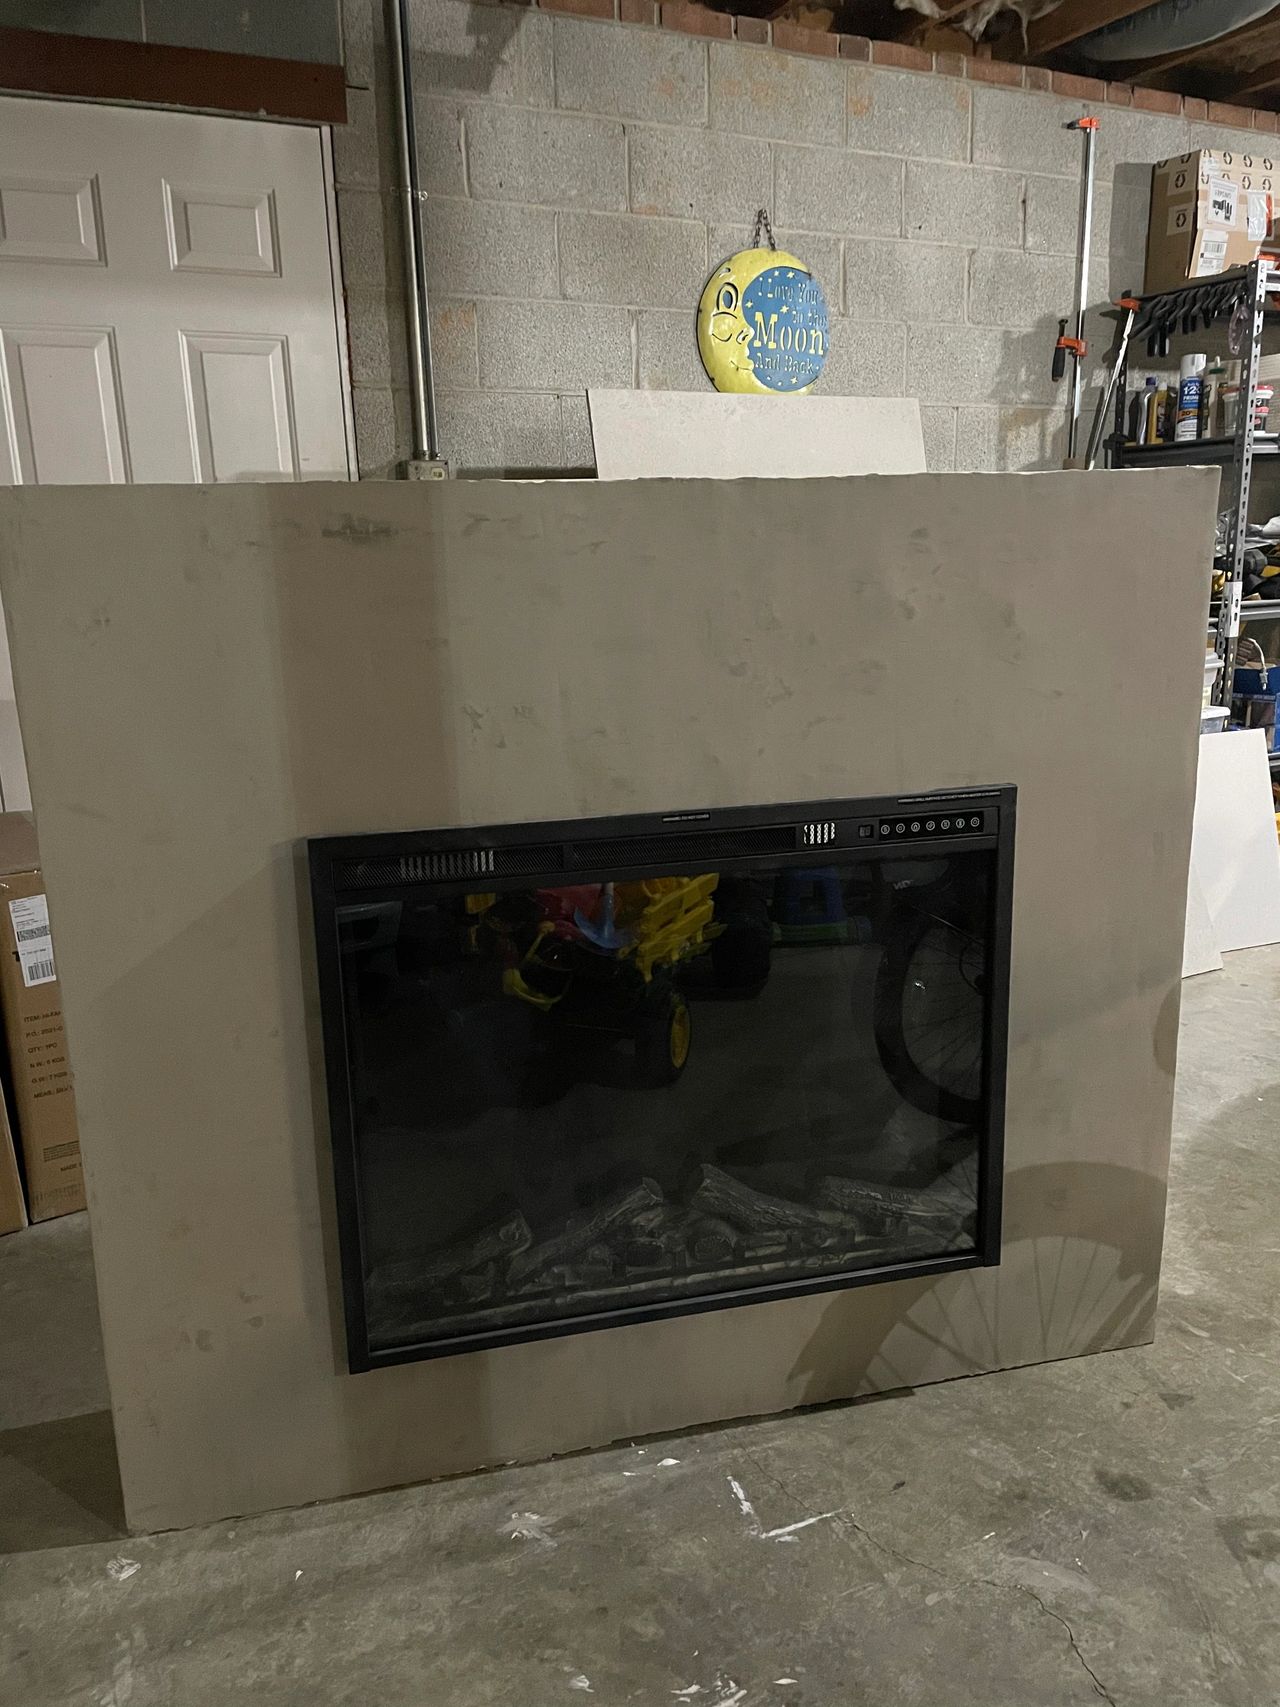
You will also need a putty knife and use in in a feathering thin layer (repeat 2-3 times sanding inbetween with 220 each coat**THIS IS MESSY). Once you have all your coats you can take a damp cloth and wipe out any scratches or high spots remaining after sanding and remove additional dust. Don’t overwipe or it will remove finish.
Once you have done this, the fireplace is complete and you can now build the mantle!
Mantle Build
Once the fireplace is built you are ready to add the mantle. Depending on what look you are going for will determine you mantle size but I wanted mine slightly larger than the fireplace so I chose to use 1×12 for the top and bottom and 1×6 select pine for the front.
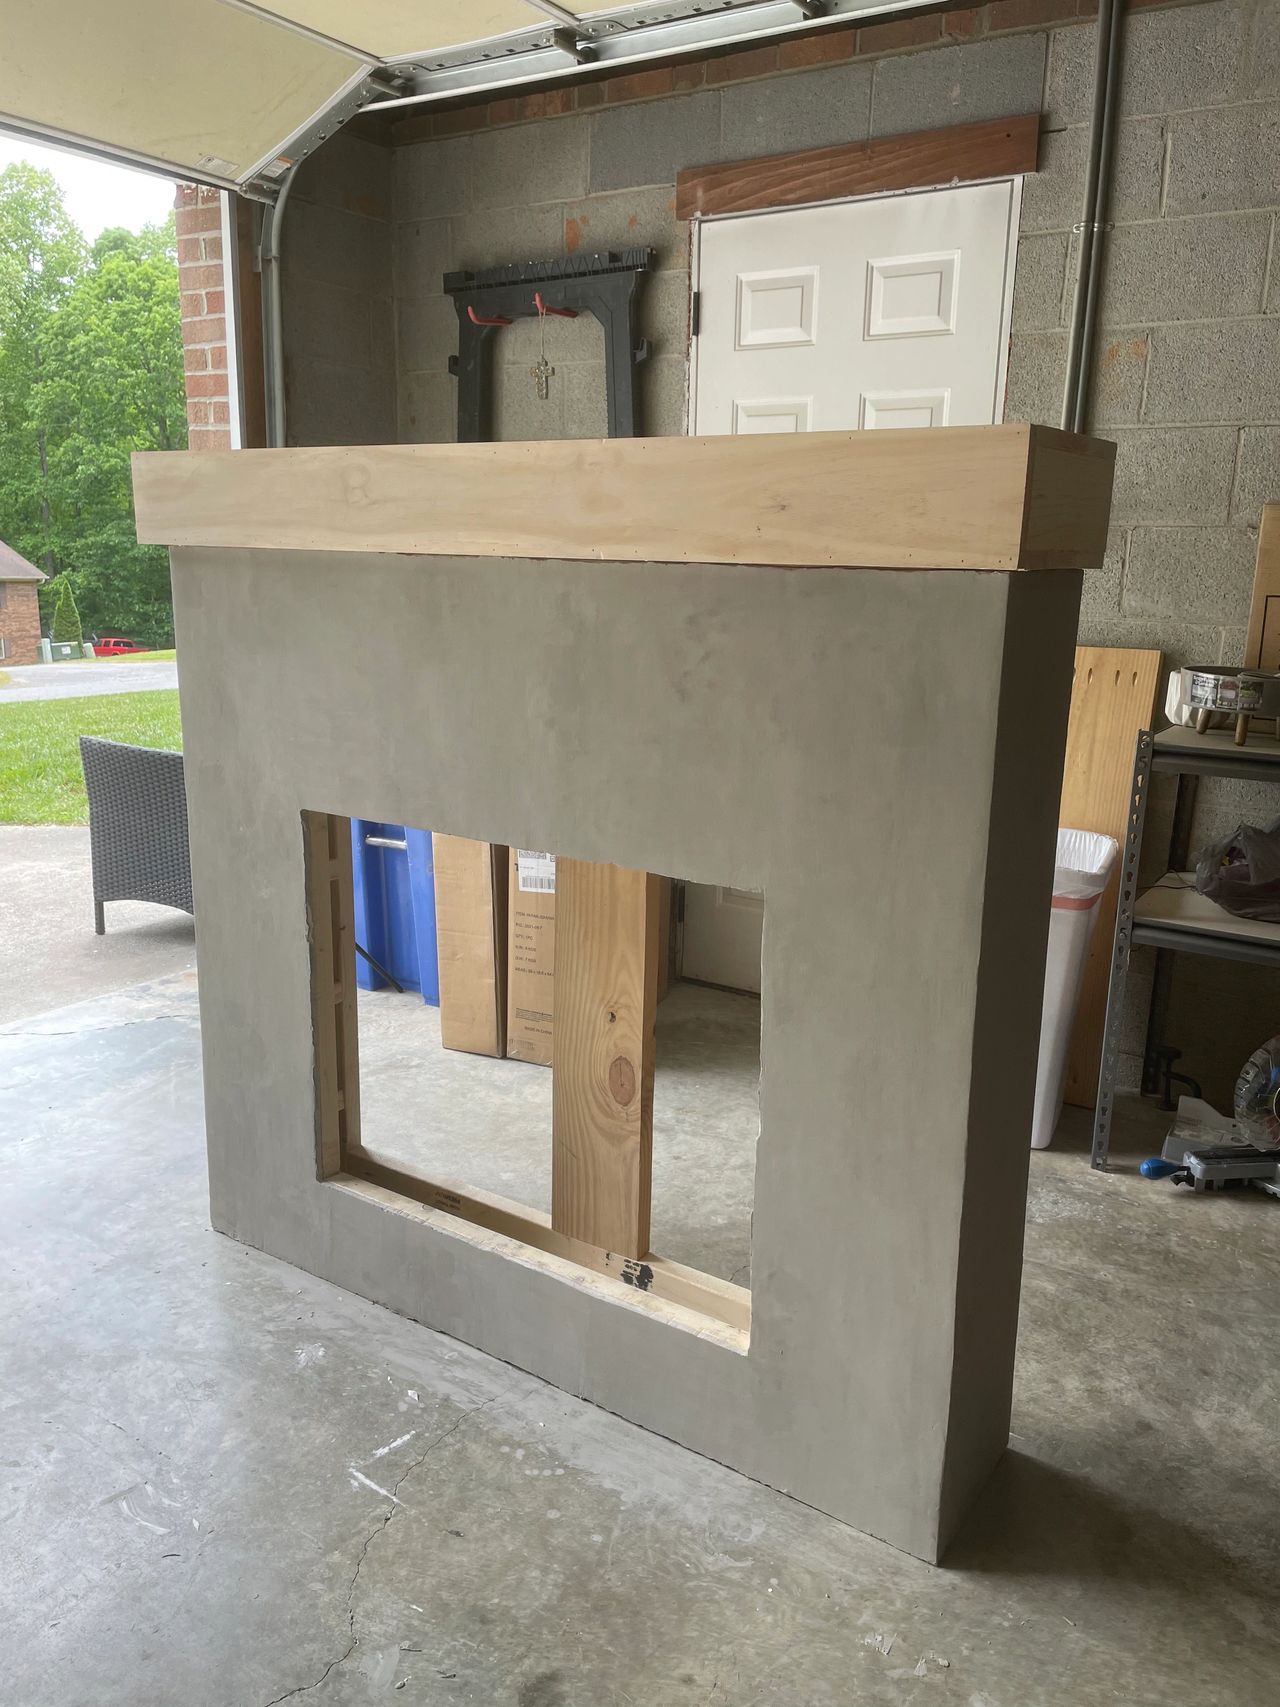
Begin by cutting your boards to desired length. Once cut lay you bottom board which will attach to the mantle on a flat even surface.
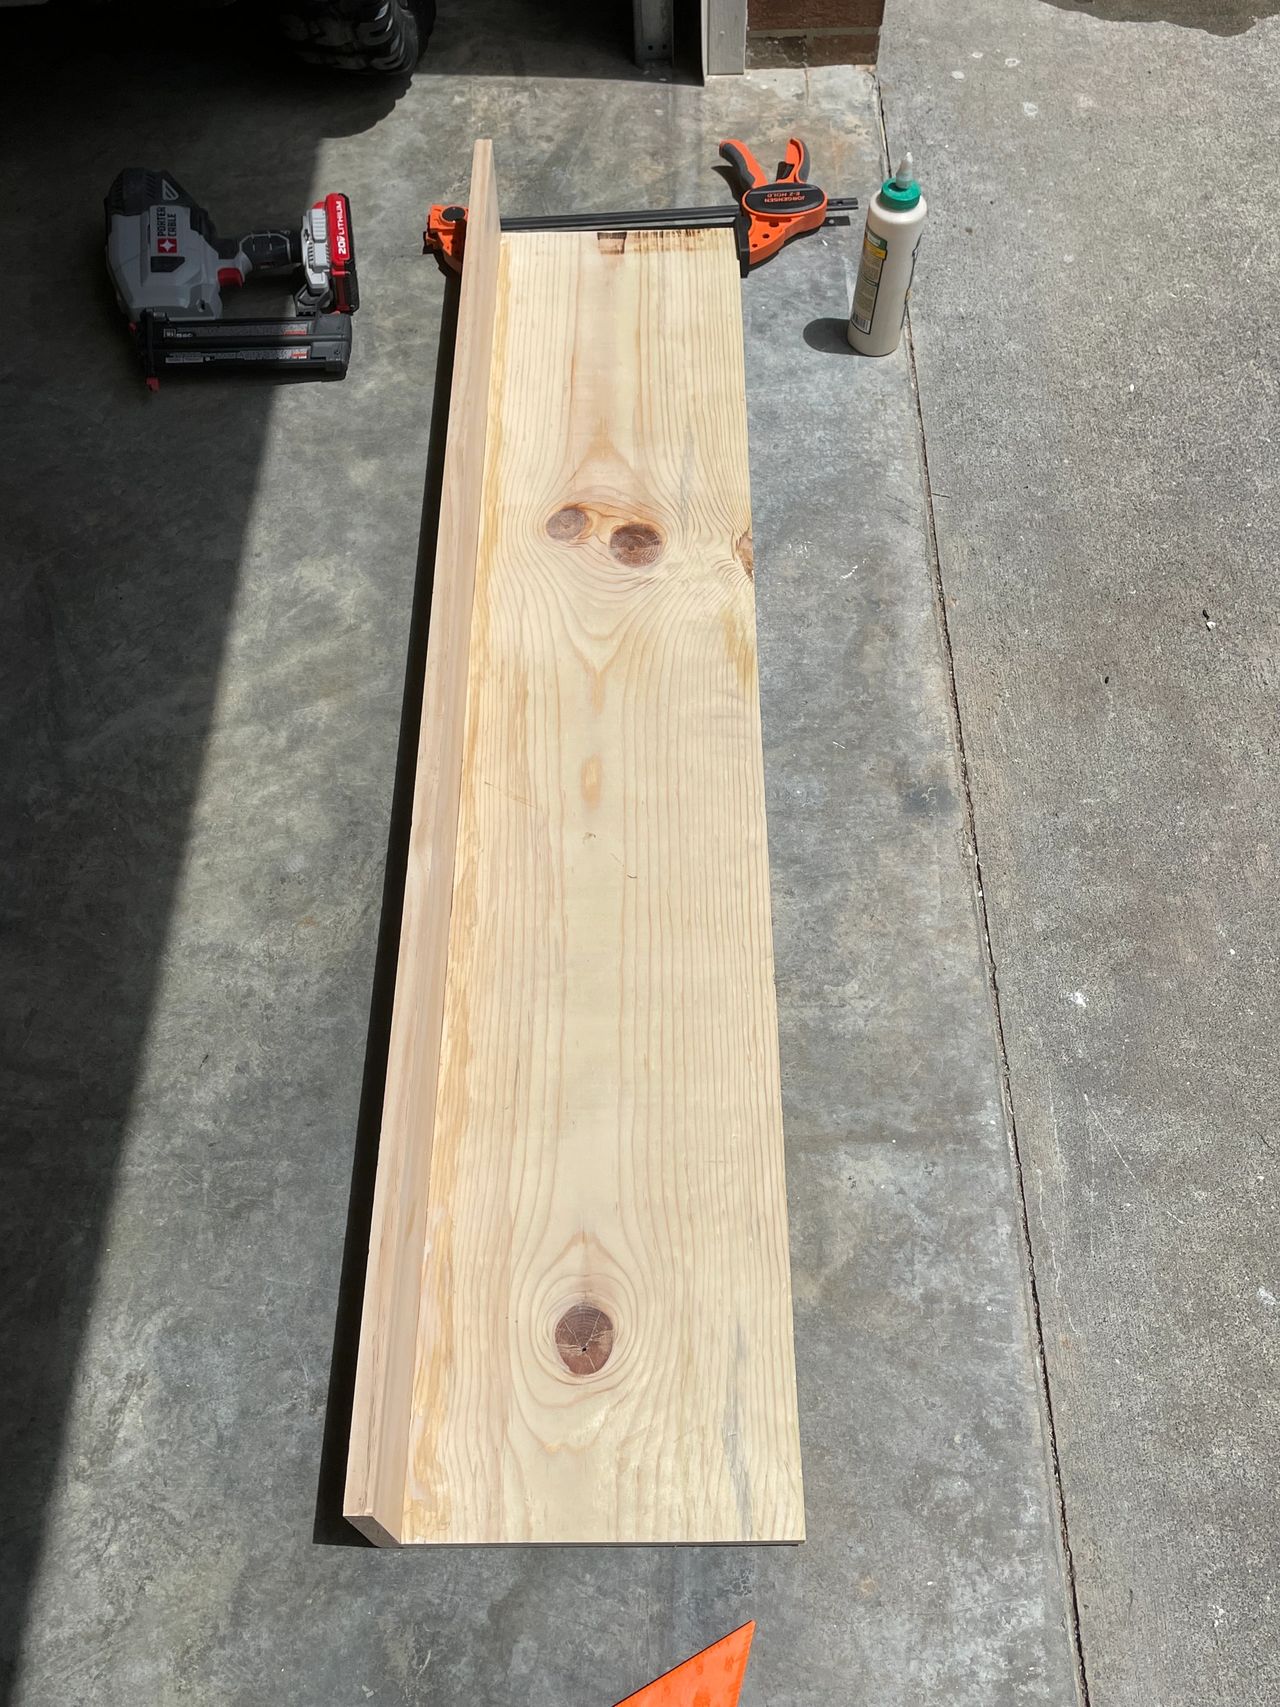
To ensure a seamless look you can bevel your edges or make your front piece 3/4 inch longer on each side and will cover the side pieces resulting in a more seamless look. Unfortunately this is not what I did but realized after.
Using your nail gun and wood glue attach the face of the mantle in front of the bottom of the board. Once you have done that create supports which will fit inside of the mantle and support the top piece.
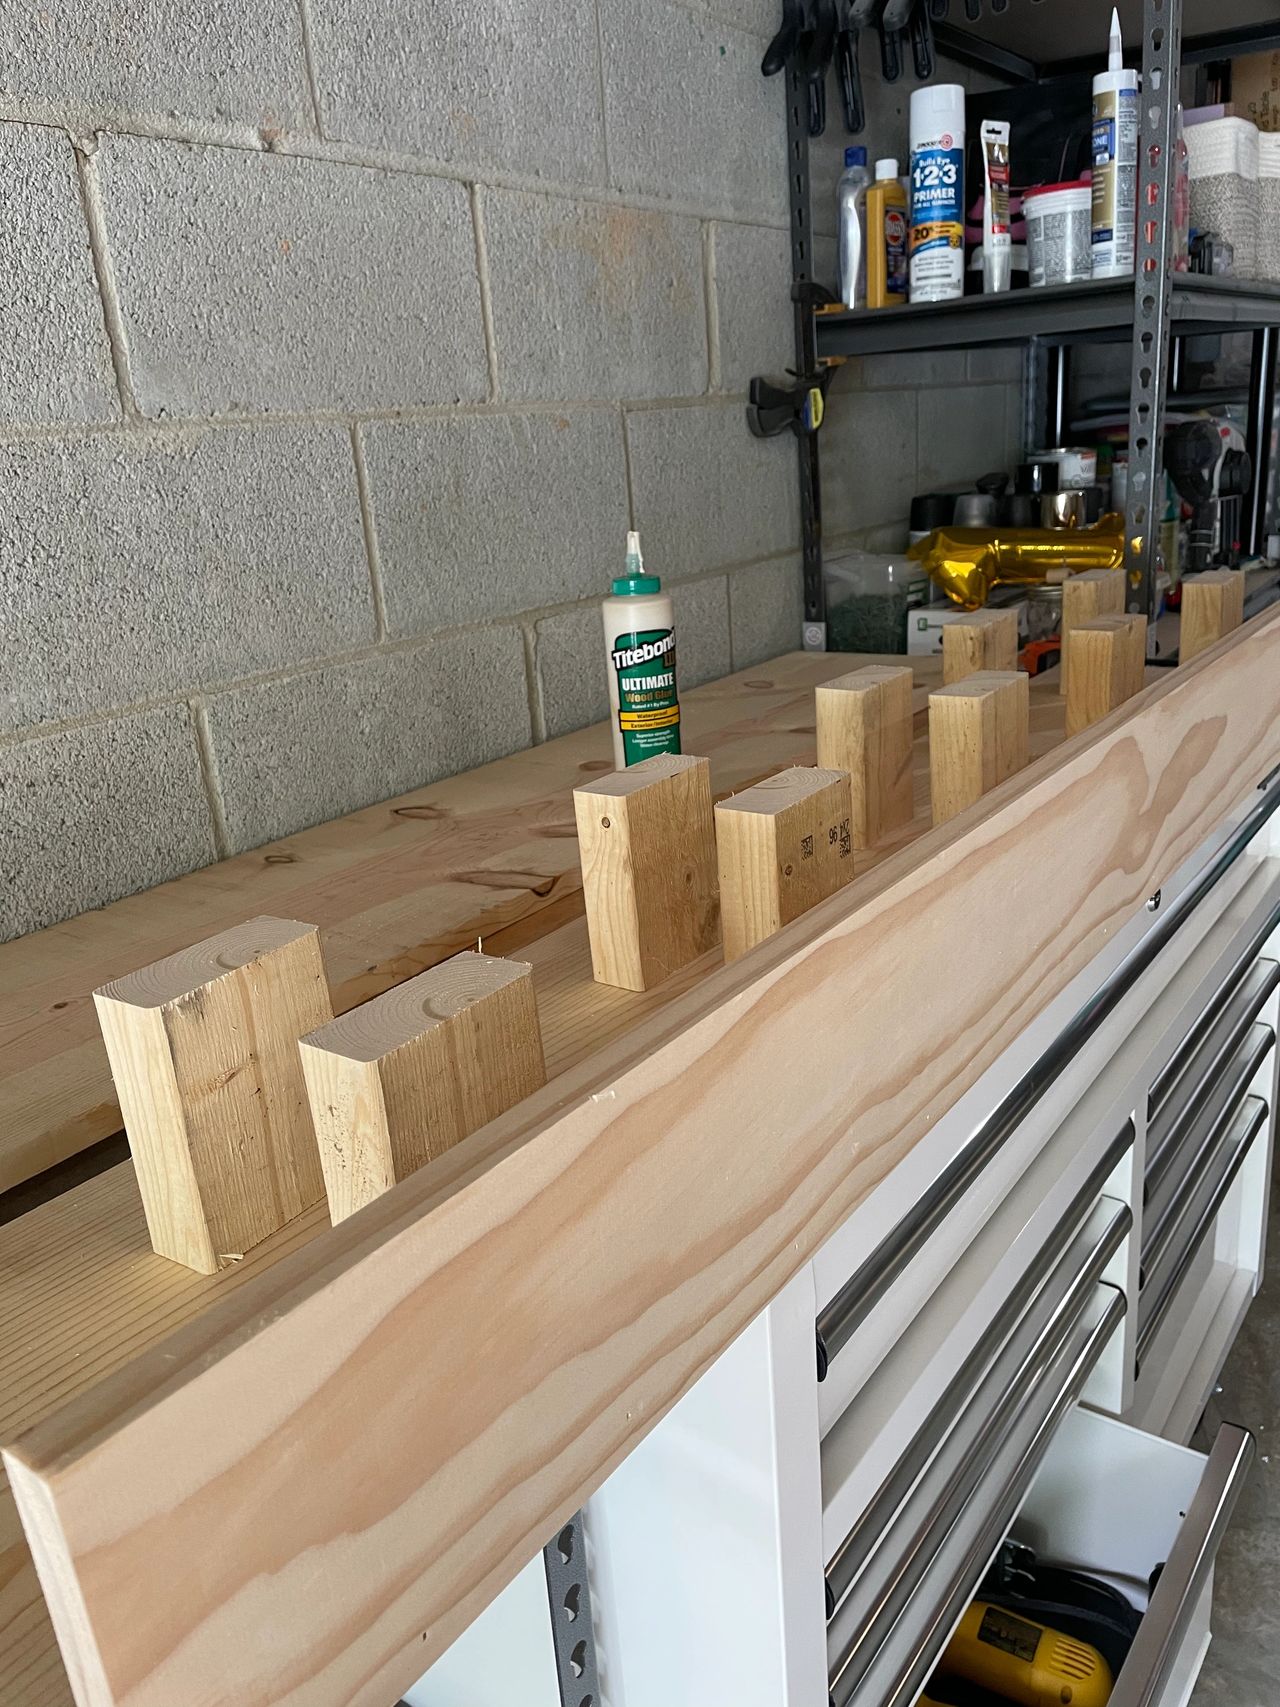
With the supports added you can now add your top board. Using the same method as the bottom, add glue and attach top with your nail gun. This will complete the bottom, front, and top of your mantle. Now it is time to add the sides. Depending on the method you choose (longer front or beveled edges) cut your sides and attach using the glue and nail gun.
Sealing the mantle
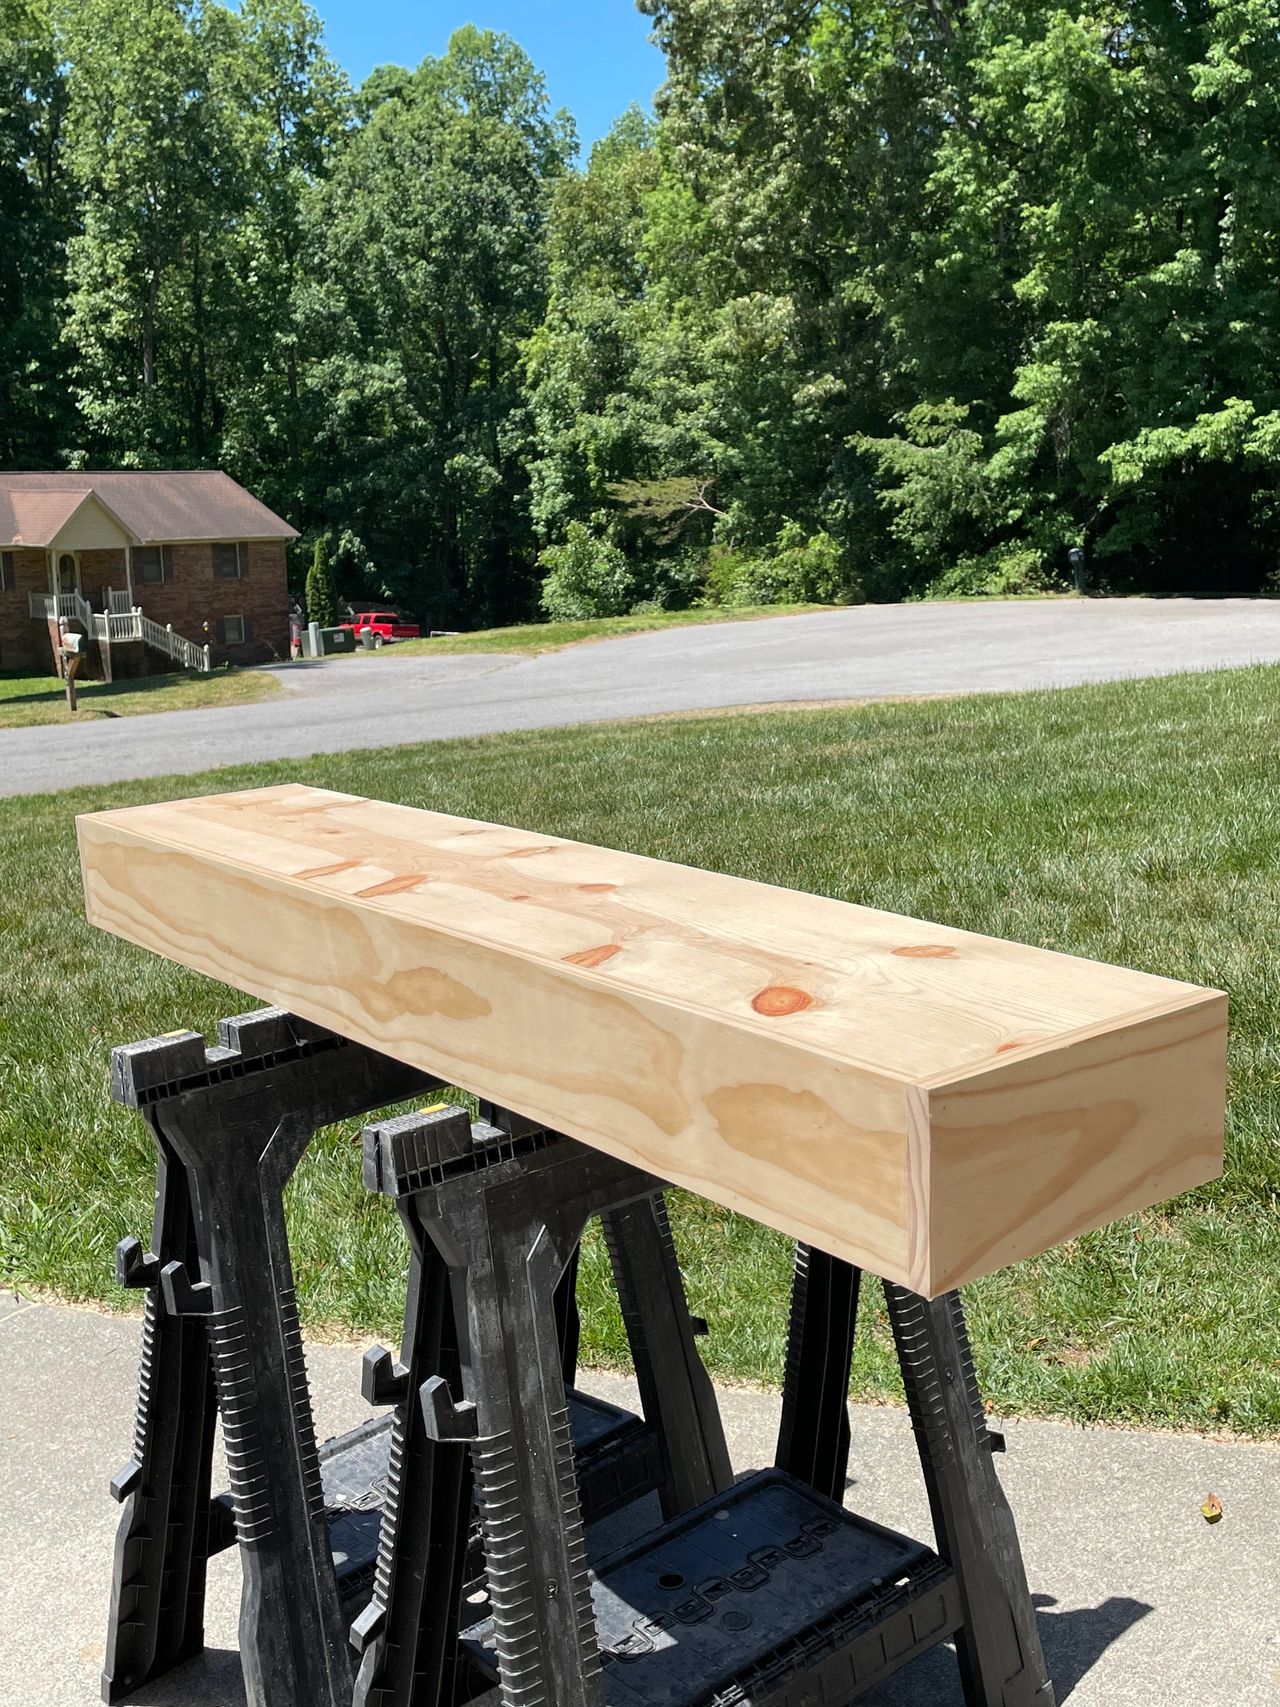
Once your mantle is built, fill any holes sand entire mantle with 120 then 220 sand paper for a smooth finish. Once done choose desired stain and top with poly acrylic.
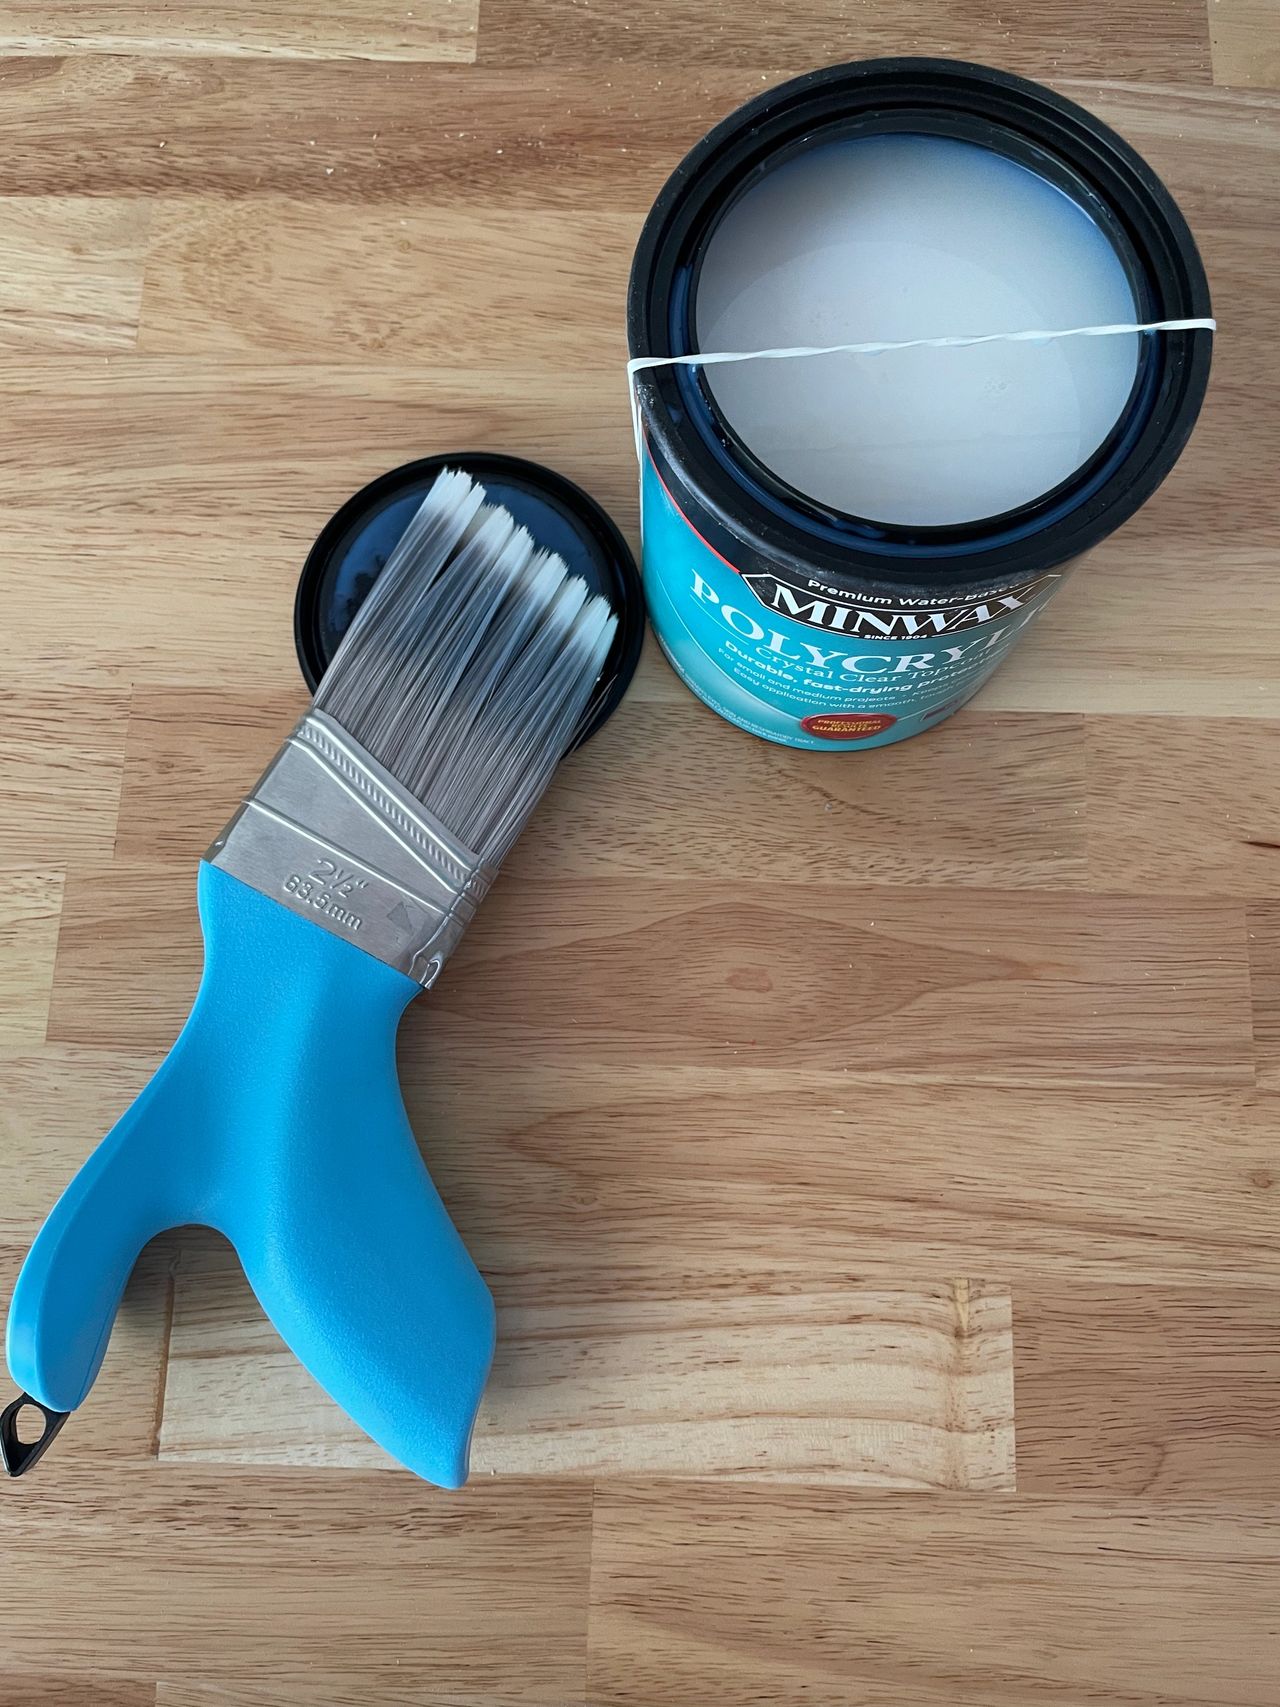
Freeform paint brush made the poly acrylic application so easy and smooth! Highly recommend for all your painting needs! Use code lunchbreak15 for 15% off your order at FreeFormbrush.com
You are now ready to move your fireplace into its home (if not stationary) and attach mantle using wood screws to go from mantle into top fireplace supports.
I also added a bottom trim piece and attached fireplace once in its new home!
…and here’s the final product!
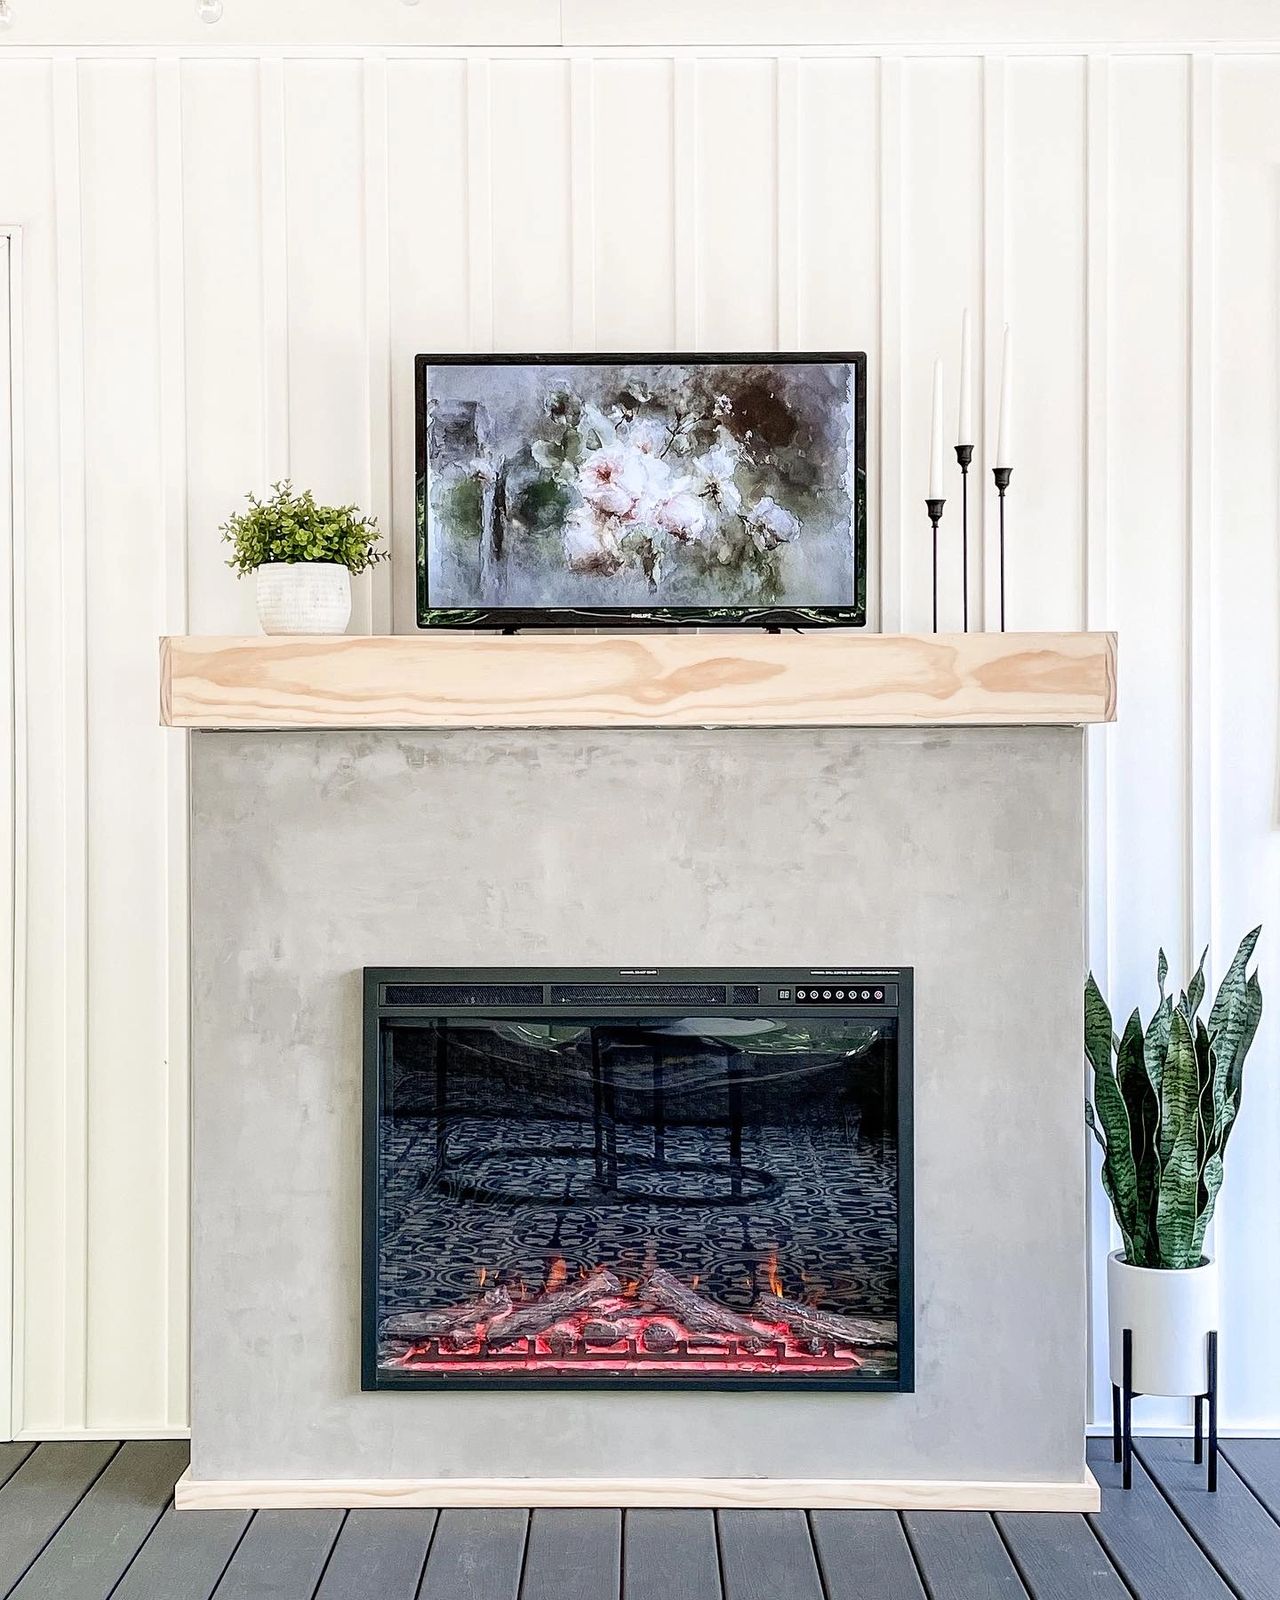
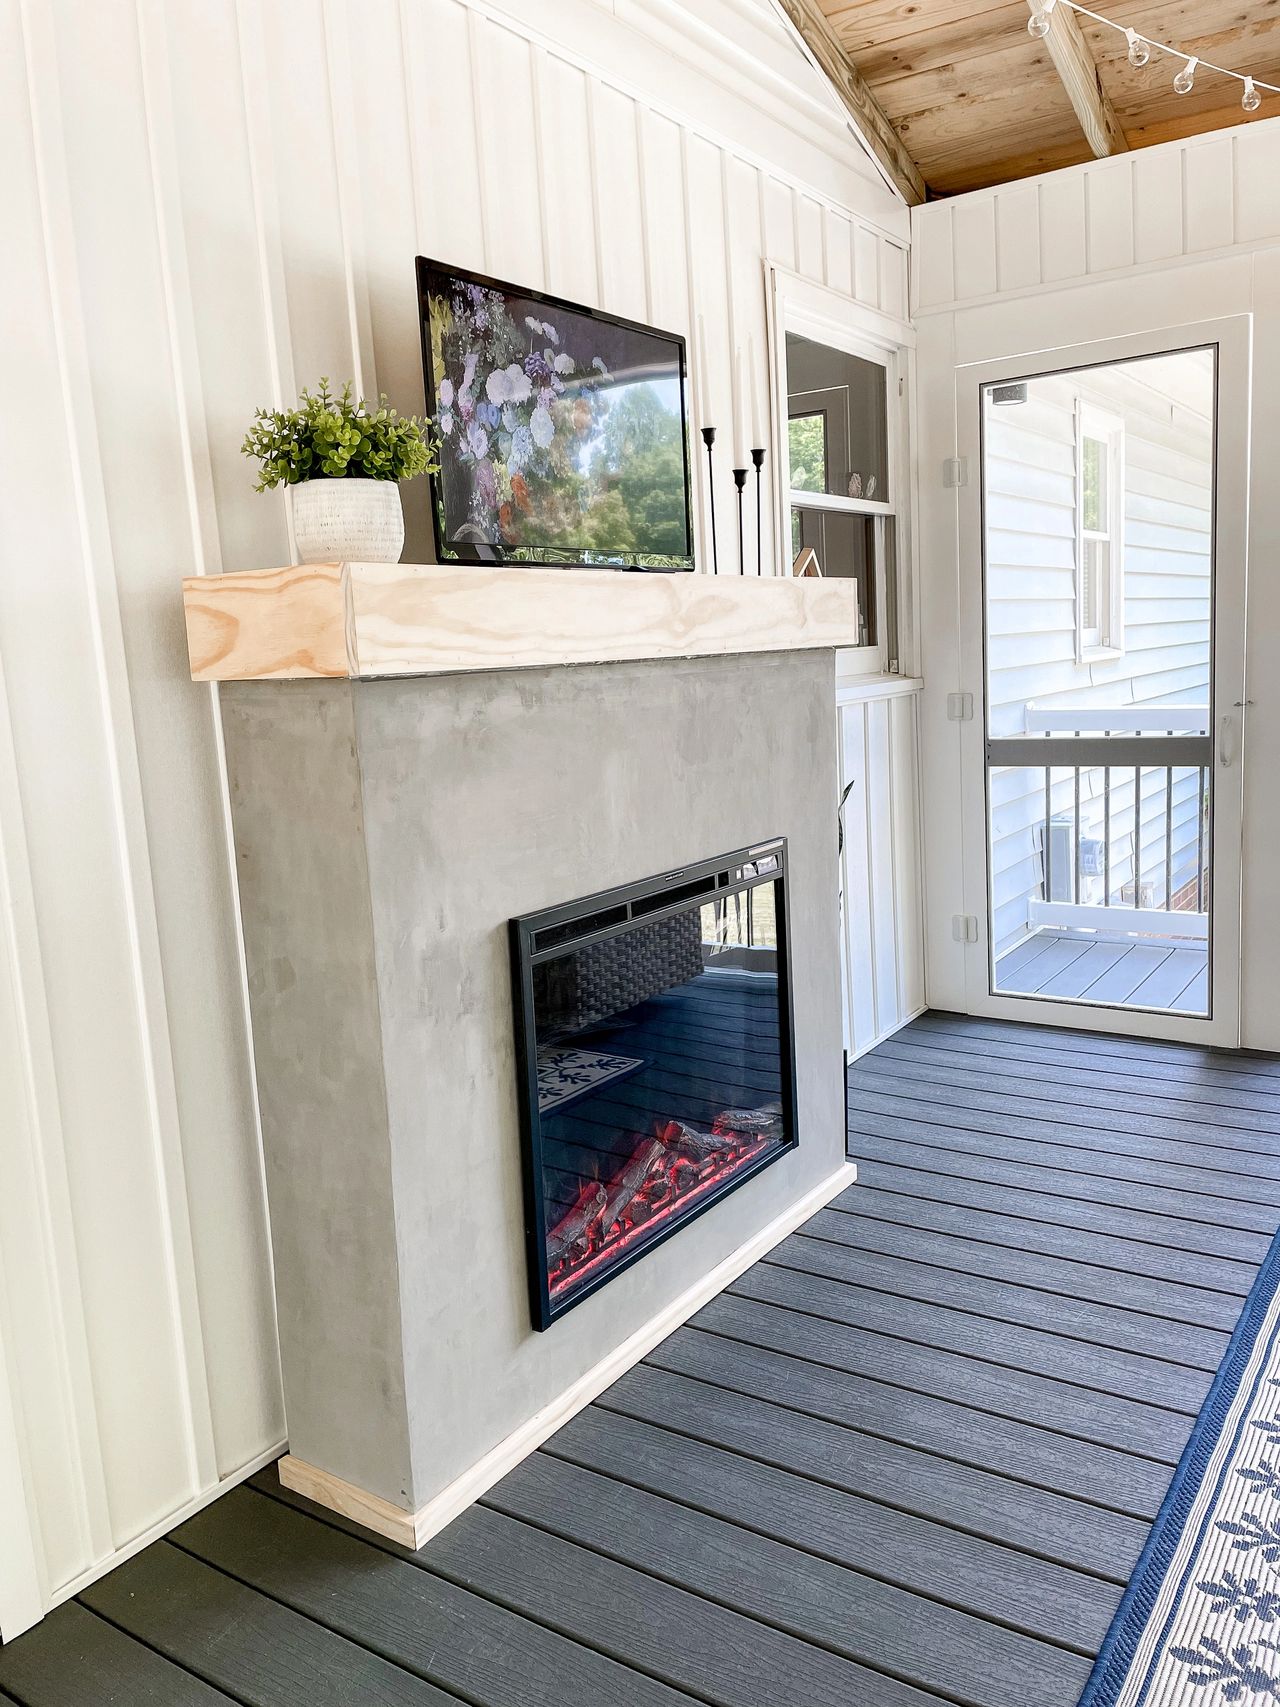

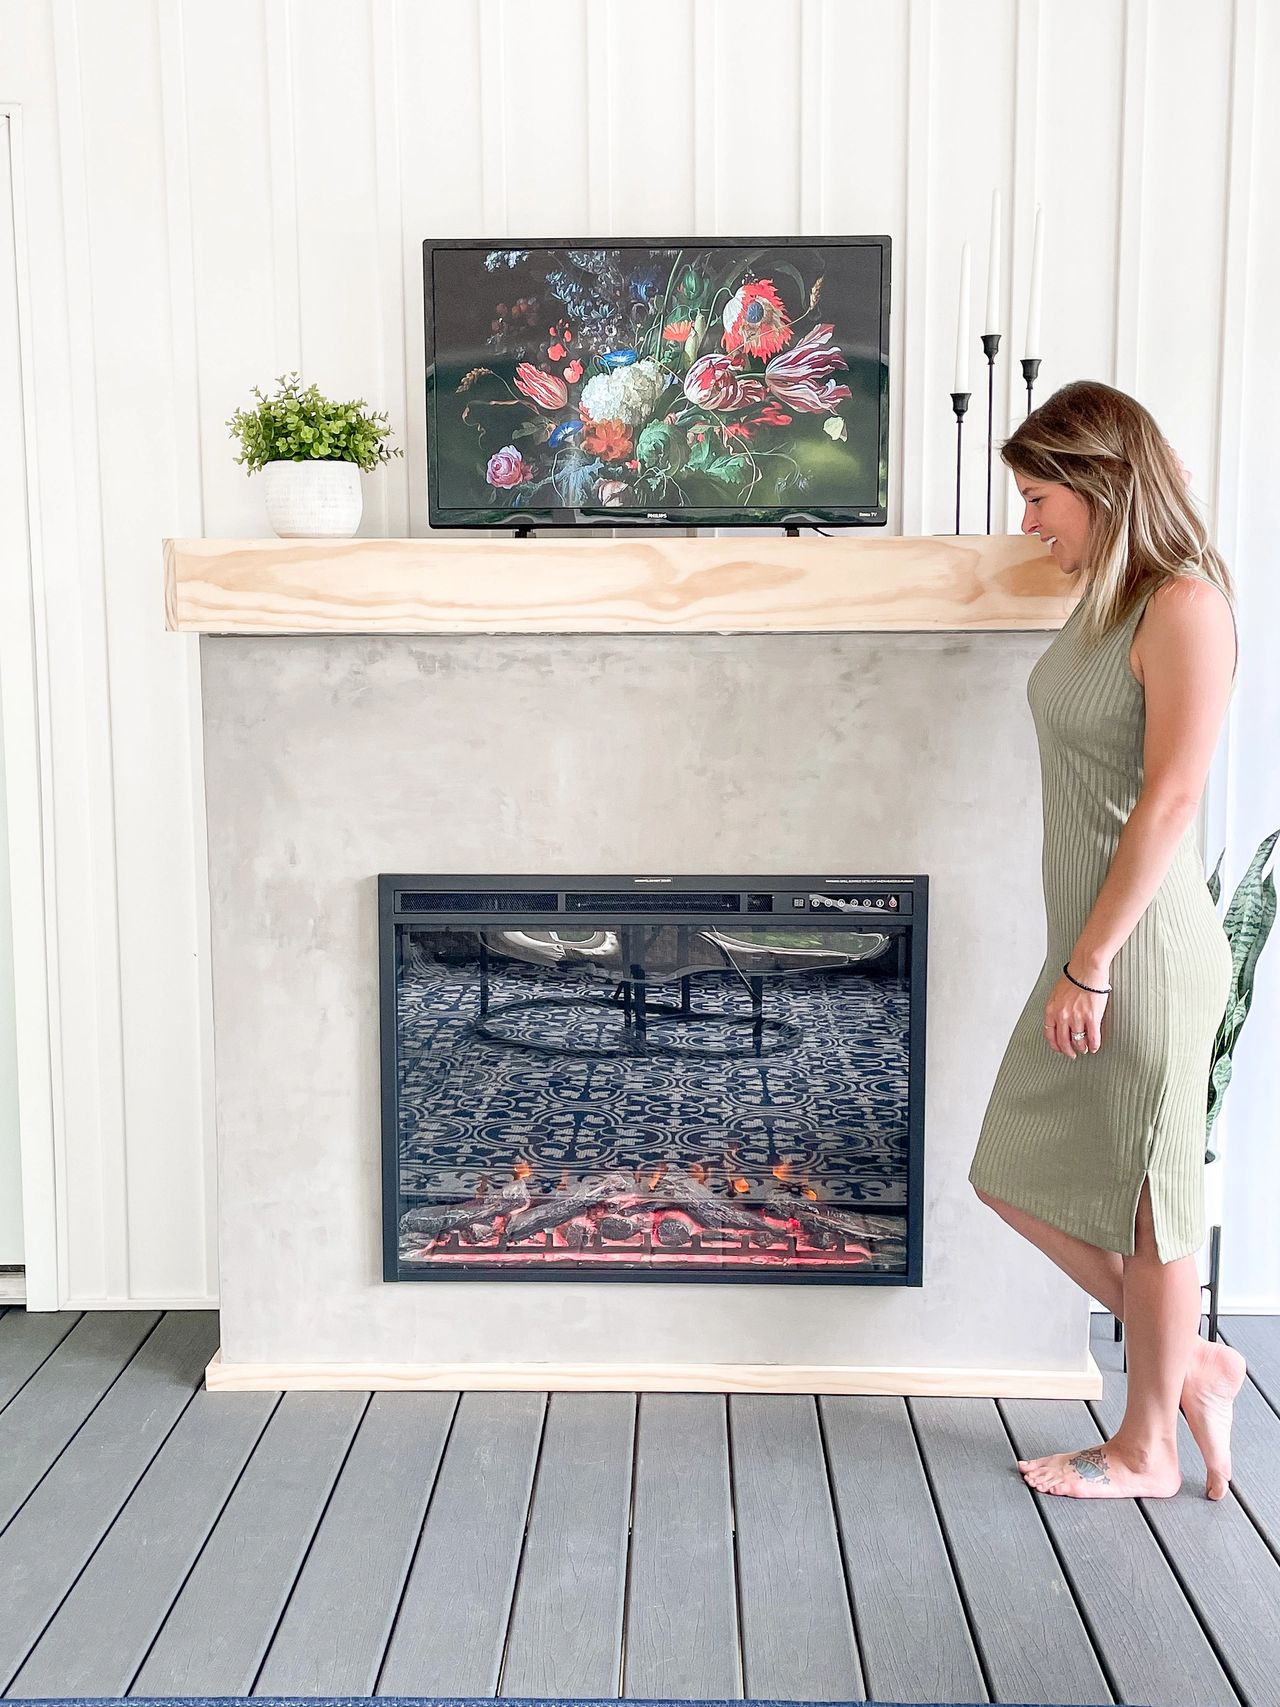
Building this fireplace was an learning experience but so fun! The perfect addition to any indoor or outdoor room!
This post is not sponsored and truly love all products used.
Follow lunch break builders for all your DIY fun! Let’s learn and build our dreams together!
Feel free to DM me with any questions! I look forward to seeing your creations!
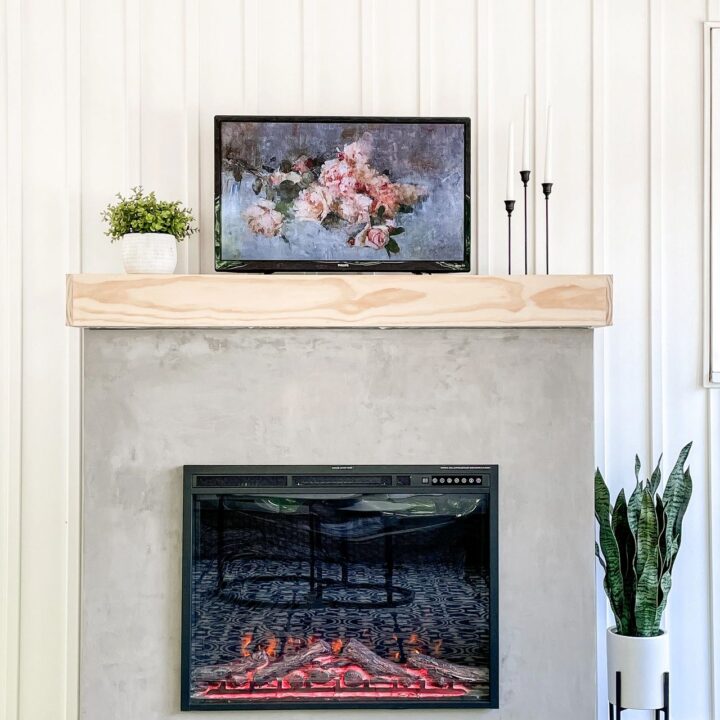
DIY Faux Concrete Fireplace
This fireplace is perfect for inside or outside and will be such a great addition to any space!
Materials
- 10 2×4
- 2 1x12x8
- 1 1x6x8
- Kreg Screws/Wood Screws
- Wood Glue
- Hardi-Backer Board
- Backer Screws
- Bucket
- Planipatch
- Fireplace insert use code LBB10
- Speed Square
- Durarock/Joint compound
- Mold Resistant mesh tape
Tools
- Circular Saw/table saw/Miter Saw
- Pocket Hole Jig
- Drill
- Nail Gun
- Mixer paddle
- Drywall Knife assortment
Instructions
1. To start off this project you will need to determine the size of your fireplace in total. In addition you will need to have your fireplace insert to determine width of face frame. For this project I used 46 x 10 x 57 for the dimensions of my fireplace with a 32 Inch frame for inset.
Building the Frame
2. Once you have determined your dimensions you will begin to build the frame of your fireplace. To do so start by creating 2 boxes based on your dimensions (mine is 46X10x57).
3. With your boards cut to length you will need to create pocket holes which you will use to attach the frames together
4. Once you have your pocket holes you are ready to attach! Using your speed square to ensure perfect corners, line up and apply wood glue then screen all your corner pieces together resulting in 2 identical box frames.
5. Based on the total width of your fireplace you will then cut your 2×4 to length minus the front and back frame. I used a total of 10 inch width using 7 inch sides to attach to the frame to make a full box. **
6. Once the side is attached you will then attach the other side of the frame.
7. Now it is time to add supports. By cutting multiple 7 inch wide 2×4’s, I added in supports throughout all the sides and top of the fireplace (keep in mind you will mount the mantle to the top supports). I used countersink holes for this step instead of pocket holes. I also knew I wanted my fireplace to sit higher than the bottom 2×4 so I attached an additional board which the fireplace will rest on.
8. Last thing you will need to do is dry fit your fireplace insert to determine the frame in which it will attach. Based on my dimensions I added in side supports in the front frame which hold the insert in place.
Attaching Concrete Board
9. Using Hardi-backer cement board you will attach it to all the surfaces using backer screws (ensure that your screw is slightly below the board- do not screw too tight or you will break the concrete board)
To cut the backer board you can use a variety of things including a sharp knife but I found easiest (but messy) way to cut was my circular saw. Be sure to use the proper protection! Cover the front and sides of the fireplace.
10. Once you have covered with the backer board it is now time to cover your joints and seams to create a flat finish. Using durarock (recommended) or joint compound with a mold resistant mesh tape and corner edges cover joints and seams then sand til all joints and seams are covered and smooth. **May require multiple coats
Faux Concrete Finish
11. Now that you have everything added, you are ready to add the faux concrete. After some research I found that planipatch was the best choice for me. Planipatch is a product used in flooring but makes a great faux concrete look. This product sets in 8-10 mins from the time you mix to when it starts to harden so your working time is very short.
12. Planipatch recommendation: mix in a gallon bag so you can throw out after each setting. Use the mixer paddle and planipatch and water mixture to a consistency which you deem usable. I found that around 1 cup of planipatch and 1/2 cup water worked best for me! Be sure to wash off and change bags after each setting to avoid scratches and divots in your faux concrete.
13. You will also need a putty knife and use in in a feathering thin layer (repeat 2-3 times sanding inbetween with 220 each coat**THIS IS MESSY). Once you have all your coats you can take a damp cloth and wipe out any scratches or high spots remaining after sanding and remove additional dust. Don’t overwipe or it will remove finish.
Once you have done this, the fireplace is complete and you can now build the mantle!
Mantle Build
14. Once the fireplace is built you are ready to add the mantle. Depending on what look you are going for will determine you mantle size but I wanted mine slightly larger than the fireplace so I chose to use 1×12 for the top and bottom and 1×6 select pine for the front.
15. Begin by cutting your boards to desired length. Once cut lay you bottom board which will attach to the mantle on a flat even surface.
16. To ensure a seamless look you can bevel your edges or make your front piece 3/4 inch longer on each side and will cover the side pieces resulting in a more seamless look. Unfortunately this is not what I did but realized after.
17. Using your nail gun and wood glue attach the face of the mantle in front of the bottom of the board. Once you have done that create supports which will fit inside of the mantle and support the top piece.
18. With the supports added you can now add your top board. Using the same method as the bottom, add glue and attach top with your nail gun. This will complete the bottom, front, and top of your mantle. Now it is time to add the sides. Depending on the method you choose (longer front or beveled edges) cut your sides and attach using the glue and nail gun.
Sealing the mantle
19. Once your mantle is built, fill any holes sand entire mantle with 120 then 220 sand paper for a smooth finish. Once done choose desired stain and top with poly acrylic.
20. Freeform paint brush made the poly acrylic application so easy and smooth! Highly recommend for all your painting needs! Use code lunchbreak15 for 15% off your order at FreeFormbrush.com
Notes
**note to attach the sides you can countersink the screws to attach or use pocket holes (make sure pocket holes face outwards otherwise you won’t be able to reach holes to drive screw)